Using Jupyter Notebooks on GitHub: Answers to Most Common Questions
This is a guest post by András Novoszáth
If you are working with Jupyter Notebooks, you may be wondering whether you can use GitHub with notebooks in the same way as your regular code.
In this article, we collected the most frequent questions we found about Jupyter Notebooks and GitHub and provide you answers with resources.
You will learn about the different ways you can use Jupyter Notebooks with GitHub. In particular, you will learn:
- Why use GitHub with Jupyter Notebooks?
- How does GitHub work with Jupyter Notebooks?
- How can you work with Jupyter Notebooks on GitHub?
- How can you use git and GitHub to track changes in your Jupyter Notebooks?
- How can you use GitHub to share your jupyter notebooks with others?
Let’s jump right in!
Why Use GitHub with Jupyter Notebooks?
Version control is hard to grasp for many people, especially if they are new to software development. This difficulty is even more true for Jupyter Notebooks because of their rich JSON format.
However, without a version control system like git, your work becomes even harder. As your project grows and you produce and share more and more variations of the same notebook with your team, you quickly lose track of the different versions.
This is the famous situation where you end up with files named like report_20210905-06_v05_revised_final_final.ipynb.
Moreover, it does not help that you share these files via multiple channels (e.g., email, slack, skype, shared folder) to different people at different times.
For this reason, learning git and setting up a central version control service like GitHub is a great time investment for the long term.
How Does GitHub Work With Jupyter Notebook?
GitHub is a git-based service providing hosting and code management tools for code repositories.
If you have Jupyter Notebooks in your repository, you can upload and host them, too, just like regular script files.
However, Jupyter Notebooks are different from scripts as they are JSON formatted documents with input cells and outputs. This format puts limitations on some GitHub services but there are tools to overcome those limitations.
Here’s a brief overview of how you can use GitHub for Jupyter Notebook version control -
- Use git command line or JupyterLab extensions (git & gitplus) to fetch or push changes
- Use nbviewer or ReviewNB to render notebooks stored on GitHub (GitHub’s inbuilt notebook viewer often fails to render large notebooks)
- Use nbdime or ReviewNB to track notebook changes between versions (GitHub notebook diffs are hard to read)
- Use Binder or Google Colaboratory or AWS Sagemaker to run notebooks inside a GitHub repository
- Use ReviewNB to perform notebook code reviews on GitHub Pull Requests.
We’ll be diving deep into all of these (and more) in the rest of this post.
Common Notable Notebook Projects on GitHub
Because of the rich content and interactivity of Jupyter Notebooks and the relatively easy services of GitHub, many projects choose to use these tools in combination.
Some popular notebook projects on GitHub from Tesnorflow, Microsoft, NVIDIA, Amazon can be found in this notebook repository list.
Working With Jupyter Notebooks on GitHub
Here are the three basic operations you can do with notebooks on GitHub:
- Creating and uploading notebooks to GitHub;
- Editing notebooks hosted on GitHub;
- Downloading notebooks from GitHub.
Let’s see each of them in detail!
How to Create a Jupyter Notebook on GitHub?
Let’s say you want to create a new notebook on GitHub or upload an existing one.
Unfortunately, you cannot create Jupyter Notebooks via GitHub UI unless you enter the whole JSON as text into an empty script.
What you can do instead is to create a notebook on your local Jupyter and push it to your repository.
An additional benefit of doing this is that this automatically places your notebook into a version control system with a local and a remote repository.
How Can I Edit Jupyter Notebook on GitHub?
If you want to make only minor changes to your notebook, you can edit it through the GitHub GUI.
However, we do not advise this for two reasons:
- You have to edit the file in its raw JSON format, making it painful for serious changes.
- It is good practice to rerun notebooks after each edit, so the cell inputs and outputs align with each other.
For these reasons, we advise you to edit notebooks in the following way:
- Create a new branch in your local repository;
- Edit your notebook in the new branch;
- Rerun the notebook from top to bottom;
- Push the new branch to GitHub and create a pull request.
See this article for details of each step!
How Do I Download or Copy a Jupyter Notebook From GitHub?
You can download a single Jupyter Notebook from GitHub UI or clone the entire repository.
When using the GUI, you navigate to the notebook in the GitHub repository file tree and download it from there. This method is suitable if you want to have the file separately from your repository (e.g., for reporting).
For development work, however, it is better to pull the notebook with the entire repository.
You can learn more about these options in this discussion.
Tracking Changes in Jupyter Notebooks on GitHub
Tracking changes in your Jupyter Notebooks can be important in several cases:
- Someone edited a notebook, and you would like to know the difference between the original and the new one.
- You have multiple versions of the same notebook and would like to understand their differences.
- You are running experiments with different parameters in notebooks and would like to compare the model results.
In the following section, you will learn how you can
- Track changes in notebooks;
- Pull and merge notebook changes from GitHub;
- Review notebook changes within a team.
How Can I Track Changes in Notebooks?
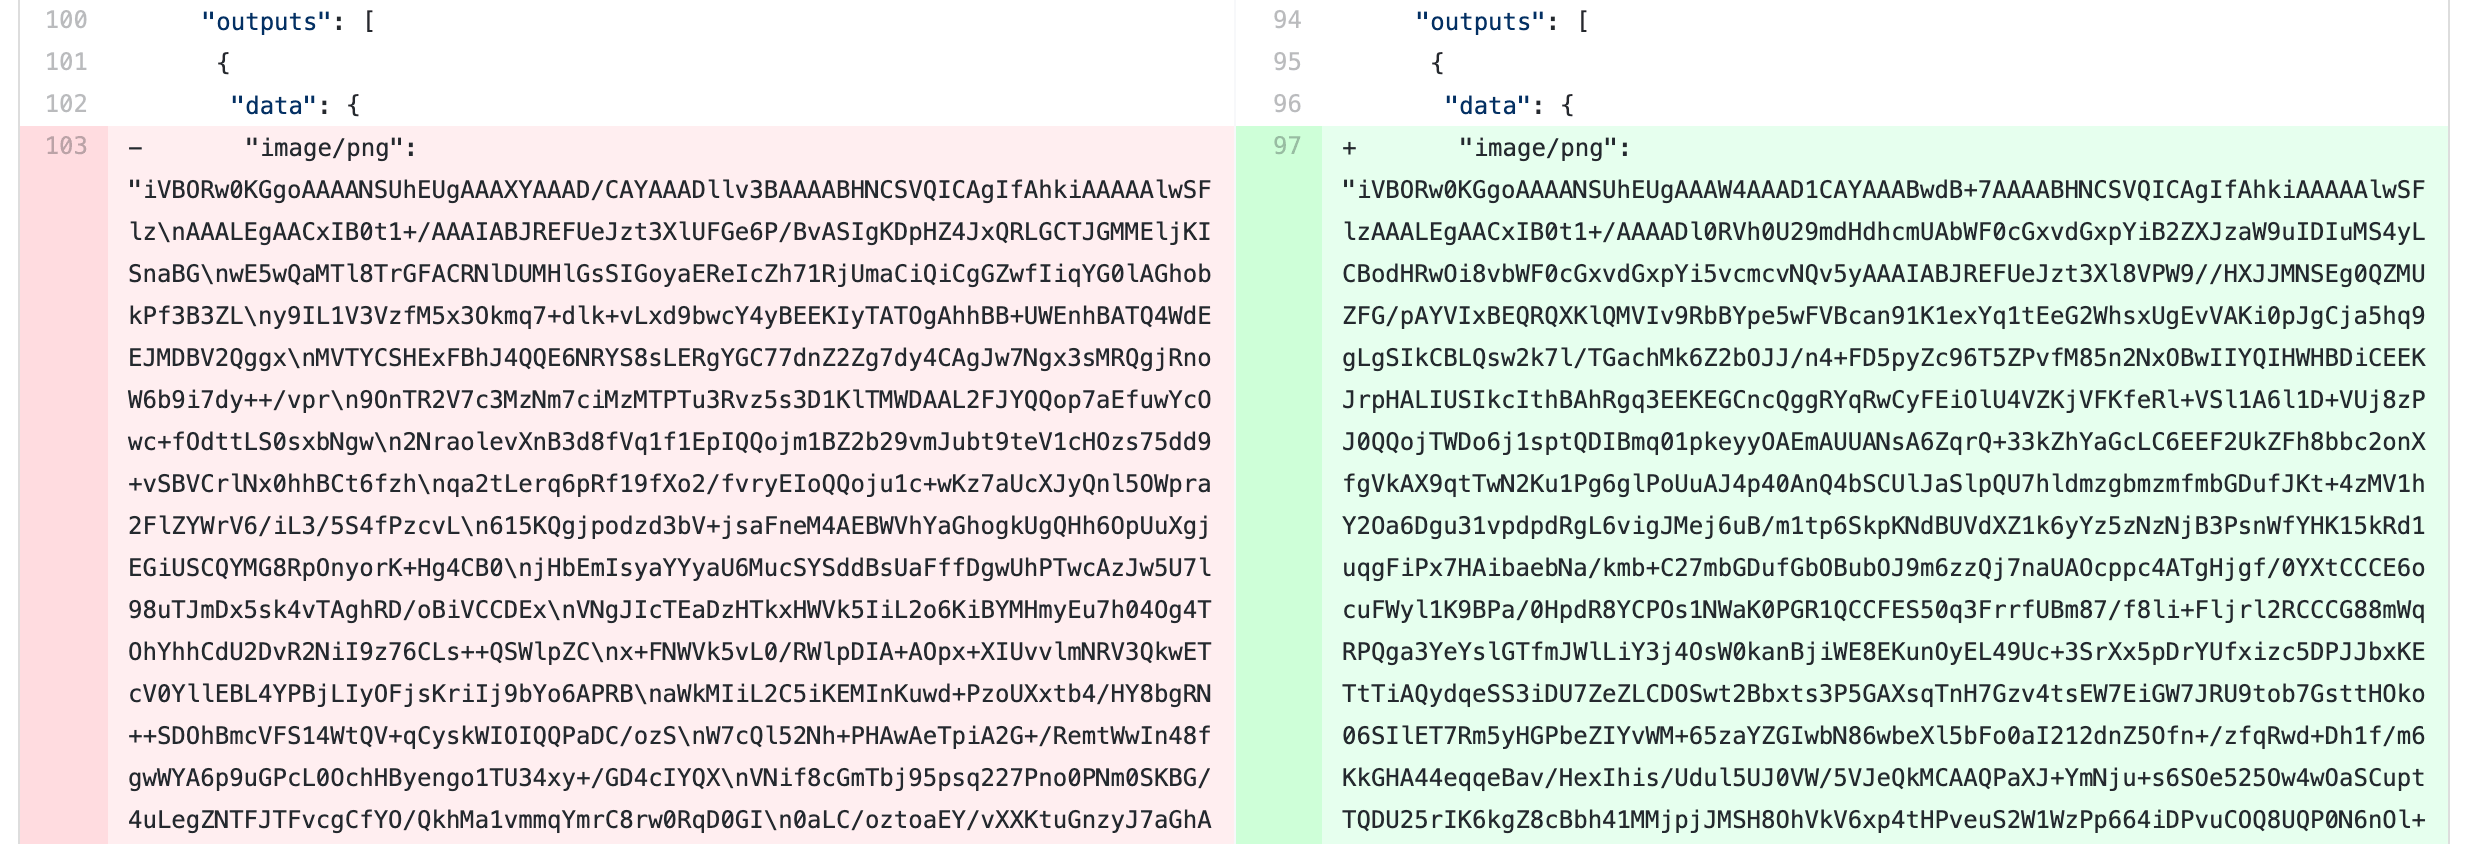
Because of their JSON format, Jupyter Notebooks diffs are hard to review.
If you try to compare changes simply on GitHub, you will see a big block of JSON formatted text that will not give you too much information.
 |
|---|
| Pull request diff on GitHub |
Instead, you can use tools like ReviewNB to review these changes quickly.
You can install ReviewNB as a GitHub app into your repository.
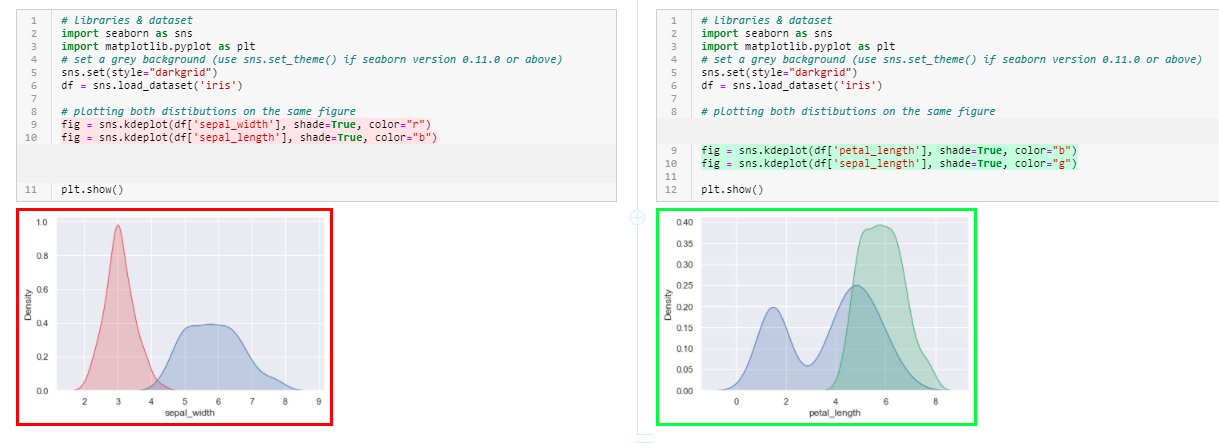
After that, whenever you make a pull request, ReviewNB will provide you both cell and outputs changes in a rendered notebook format. Check it out below.
 |
|---|
| Rich diffs in ReviewNB |
How Can I Pull & Merge new Notebook Changes to GitHub?
If you are working with Jupyter Notebooks in a development environment, you need to pull and merge changes using the repository on GitHub.
You can propagate your changes into the remote repository with the following steps:
- Stage and commit your changes on your development branch;
- Push the changes to your remote repository;
- Create a pull request;
- Discuss your changes with your team (and perhaps iterate on the previous steps a few times ;)
- Merge your changes into the
master/mainbranch.
Check out this article for more details!
How Can We Review Notebook Changes in the Team?
If you are working with Jupyter Notebooks in a team, discussions around pull requests can be overwhelming. You try to deal with issues from high-level discussions to cell-specific details in the same space.
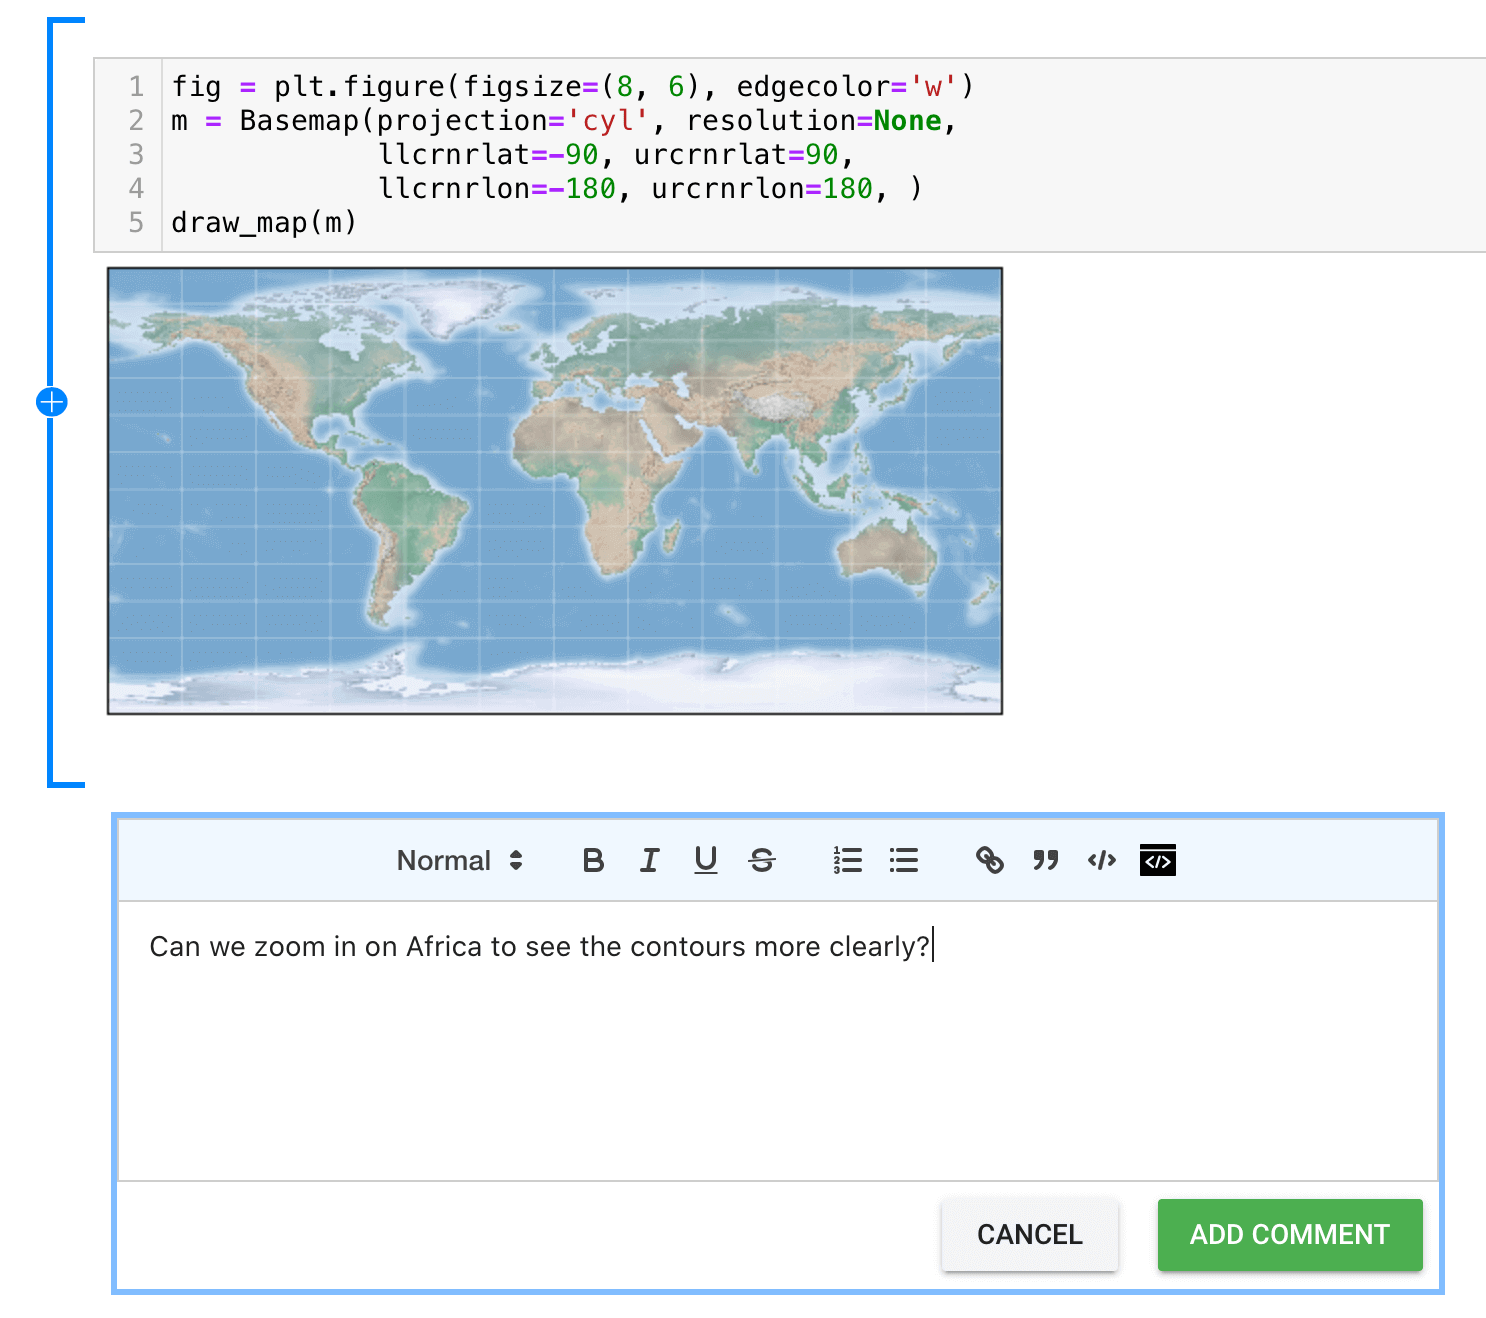
To make pull requests cleaner, you can use tools like ReviewNB to segment your discussion around specific cells, issues, and commits within the notebook. This enables context-specific discussion on your notebook cells.
 |
|---|
| Comment-level comments in ReviewNB |
You can read more about how to do this here.
Sharing Jupyter Notebooks & Integration with GitHub
A great strength of Jupyter Notebook is that you can share it as a static or interactive report. Here are a few use cases:
- You want to show your work to others;
- You want others to play with your notebooks along pre-determined parameters (using interactive widgets).
The good news is that you can achieve many of these goals quickly with the use of GitHub.
This section answers the most common questions regarding hosting and integrating Jupyter Notebooks on GitHub.
How Do I View A Jupyter Notebook on GitHub?
The most straightforward way to view notebooks on GitHub is to open them in the repository in your browser. Here’s an example.
This will show you the content of the cells and their output in a static way.
However, even this static view is unreliable as GitHub does not manage to render the notebooks all the time:
I don't understand why @GitHub STILL can't reliably render a Jupyter notebook. It's been years!
— Allen Downey (@AllenDowney) July 14, 2020
NBViewer is 100% reliable as far as I can tell. Why is this so hard?
For this reason, if you want to have a reliable link for your notebook (e.g., to share it), you may better use NBViewer for public repositories or ReviewNB for private ones.
How Do I Run/Host/Integrate a Jupyter Notebook on GitHub?
You cannot use GitHub directly to run your Jupyter Notebooks. You can use third-party services that pull your notebook from GitHub and provide you a dynamic or interactive view:
- nbviewer is a simple service that shows your notebooks with some dynamic elements turned on (e.g. interactive visualization with Bokeh or Altair.
- Binder does everything that nbviewer, but it also presents the notebook as an editable document. Here is an example.
Learn More About Jupyter Notebooks
Have we answered all your questions? Do you miss an answer you would like us to add? Let us know!
We are constantly adding new material about how to work with Jupyter Notebooks. If you want to stay updated, check out the other articles on our blog!
