How to use the JupyterLab Git extension
Quick answer: The JupyterLab Git extension adds a Git UI — clone, branch, commit, push, diff, and merge — directly inside JupyterLab, so you can version-control notebooks without leaving the editor. Install it with pip install --upgrade jupyterlab jupyterlab-git. It handles local diff and merge inside JupyterLab; reviewing notebook changes on a GitHub pull request is a separate stage with its own tooling.
Version control is indispensable to collaboration in Jupyter Notebooks. You can use version control tools like Git and GitHub with Jupyter Notebooks to:
- Track changes to your notebooks.
- Share notebooks with your team.
- Review notebooks.
- Build collaboratively on your work.
If you haven’t yet used GitHub with Jupyter, check out our basic tutorial which will show you a command line workflow to use Git / GitHub with notebooks.
In this post, we’ll talk about a JupyterLab Git extension that offers a UI based notebook git workflow (git clone, pull, push, diff, merge) right from within the JupyterLab UI.
Set up
The JupyterLab Git extension is maintained by the official Jupyter team (jupyterlab/jupyterlab-git), not a third party. You can install it like any other Python package, using pip or Conda:
# Installs/upgrades JupyterLab and the Git extension together.
pip install --upgrade jupyterlab jupyterlab-git
or
conda install -c conda-forge jupyterlab jupyterlab-git
Git workflow
Once you have installed the extension, start a JupyterLab server by running:
jupyter lab
JupyterLab will automatically open in your web browser.
You’ll see a new Git menu item at the top and a Git icon on the left-hand panel (shown in red):
![]()
Click on the icon to set up the Git extension:
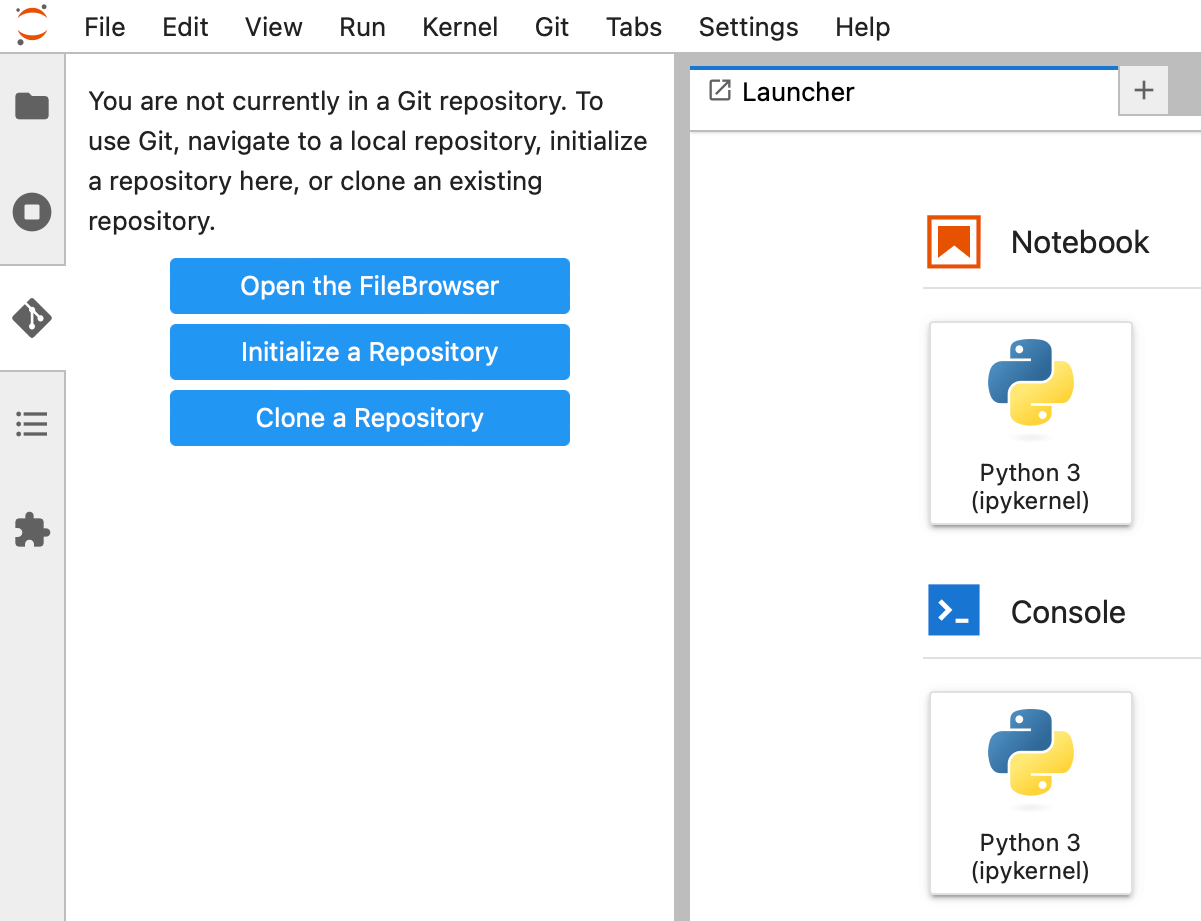
There are three buttons listed here:
- Navigate to a folder that is already in a Git repository.
- Create a new Git repository.
- Clone an existing Git repository.
Git workflow: clone
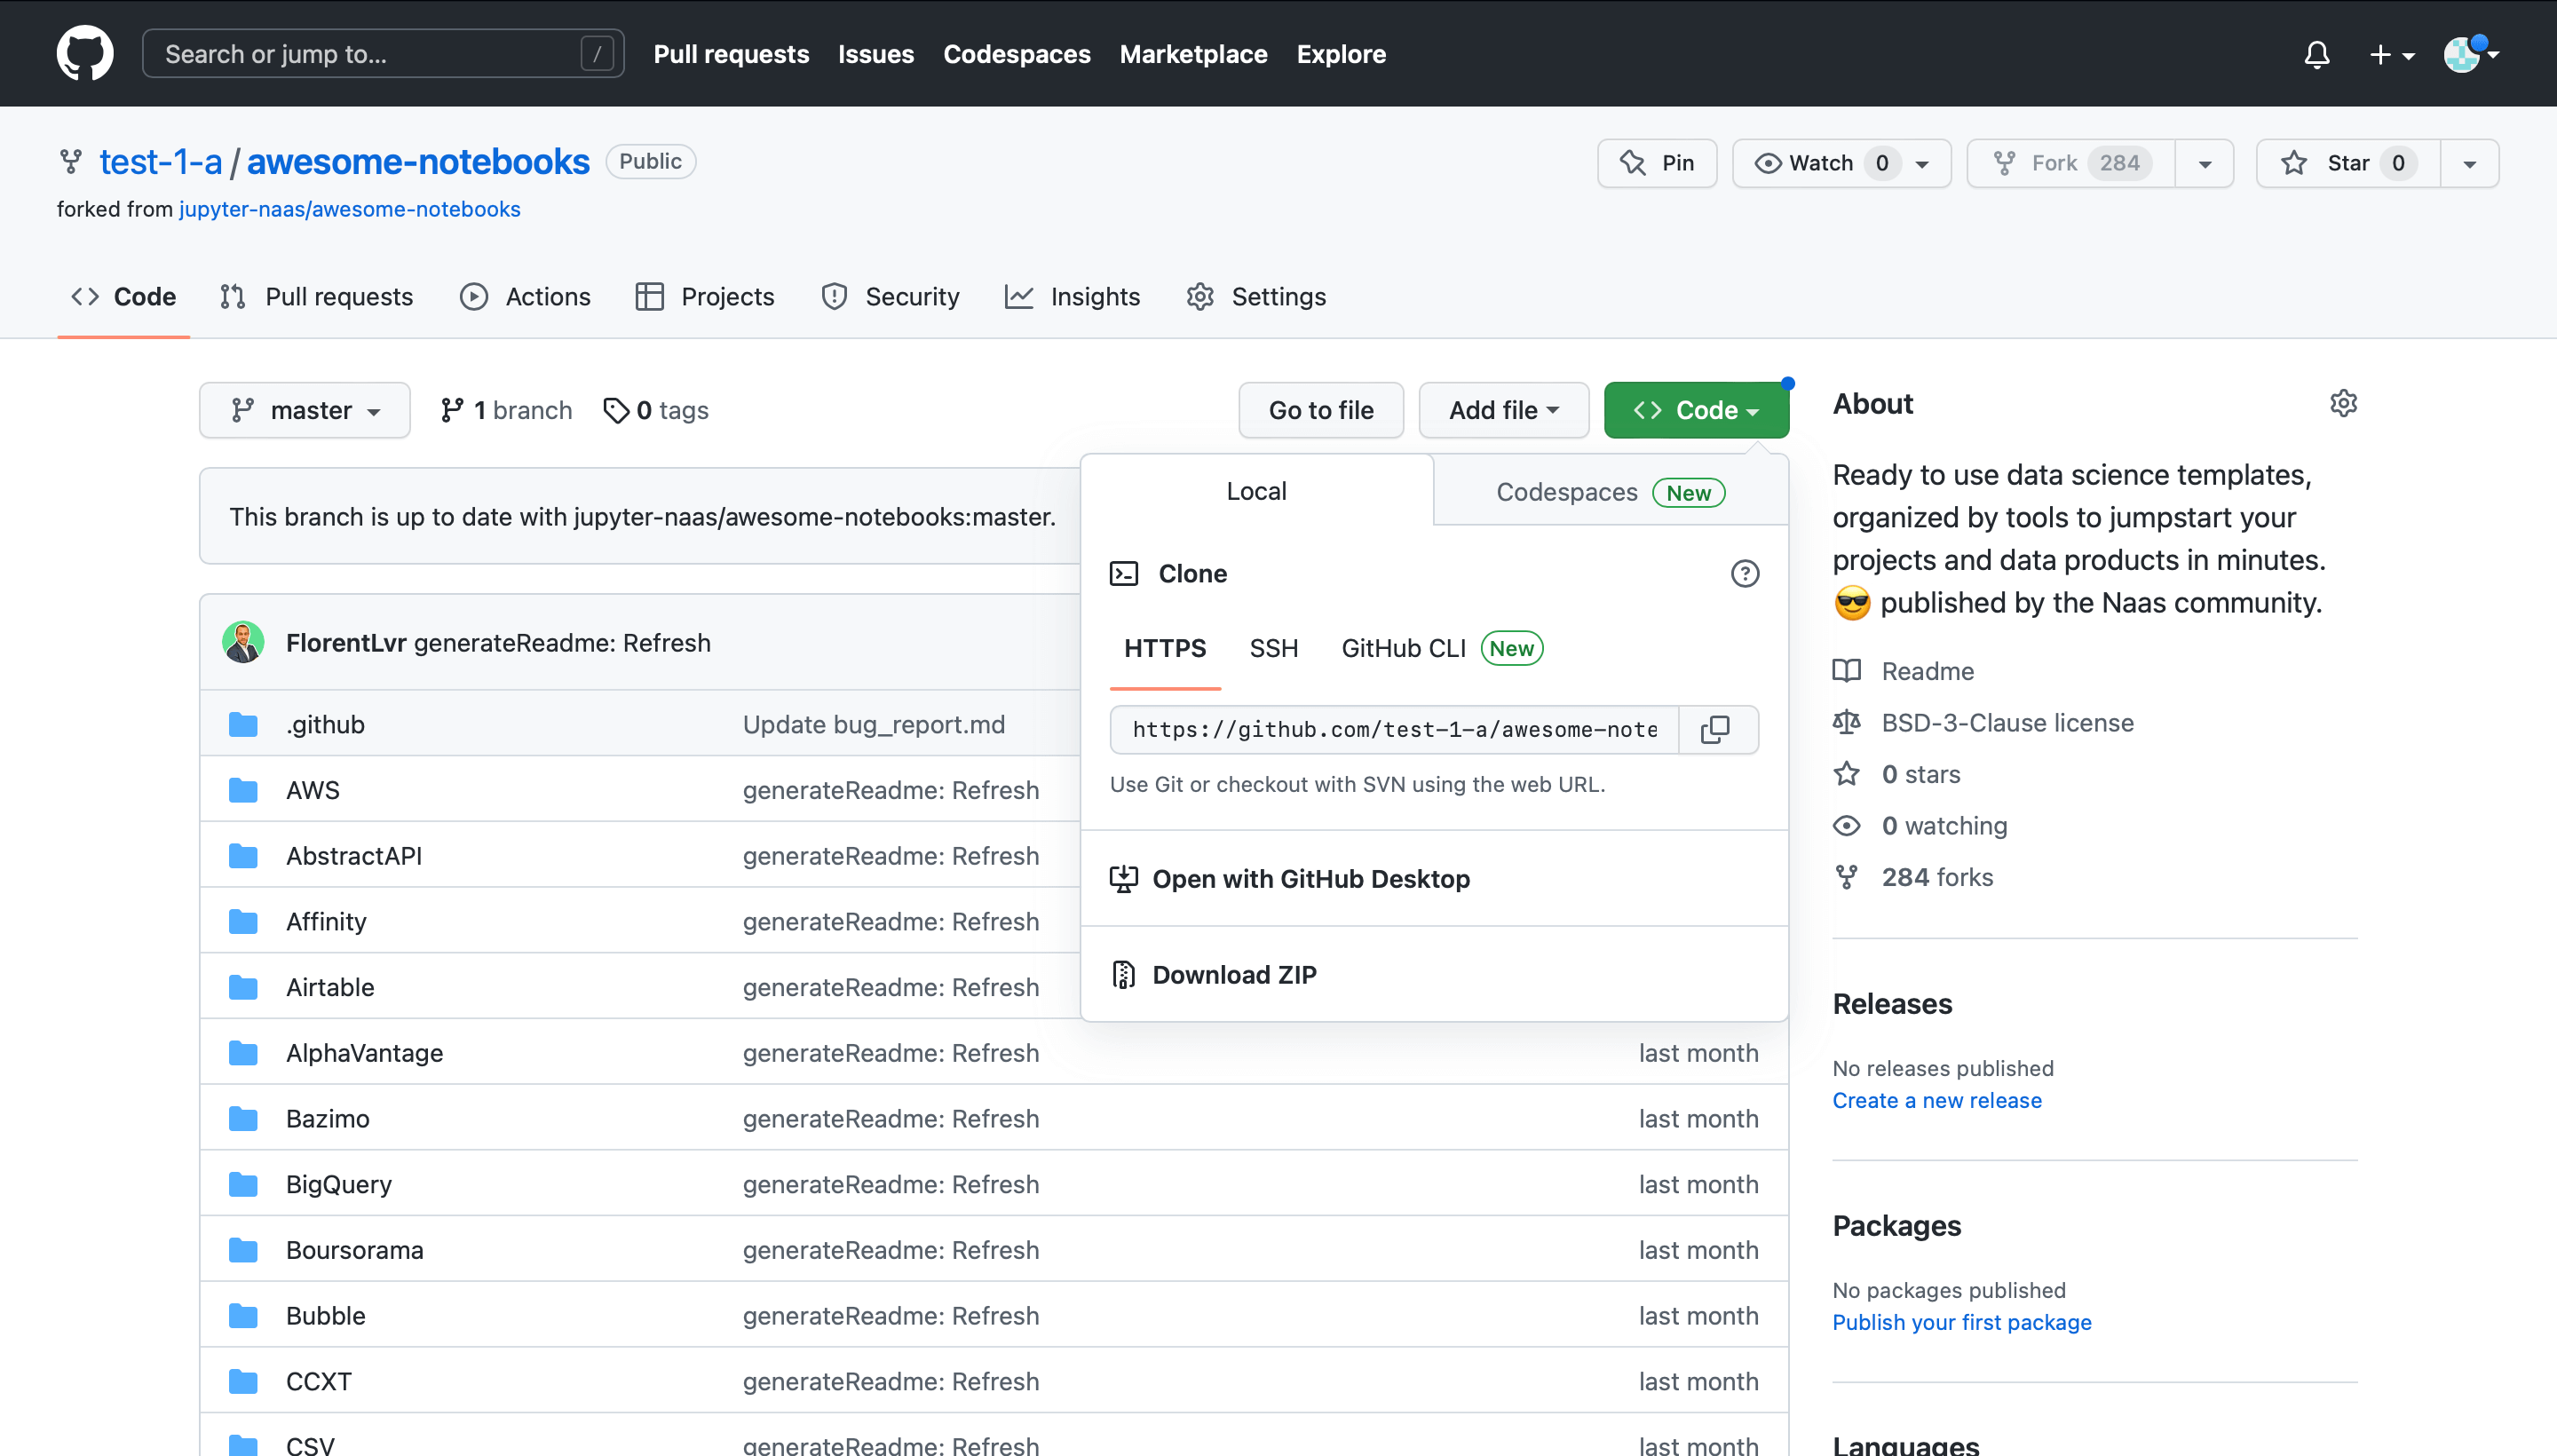
Let’s clone an existing Git repository. We’ll clone the repository of example notebooks provided by the naas.ai project.
Let’s fork the repository so we can make some changes. Next, navigate to the forked repository, click on the green Code button, and copy the link to clone the repository:
You can follow these instructions to learn more about setting up the appropriate authentication protocol to connect to a private repository.
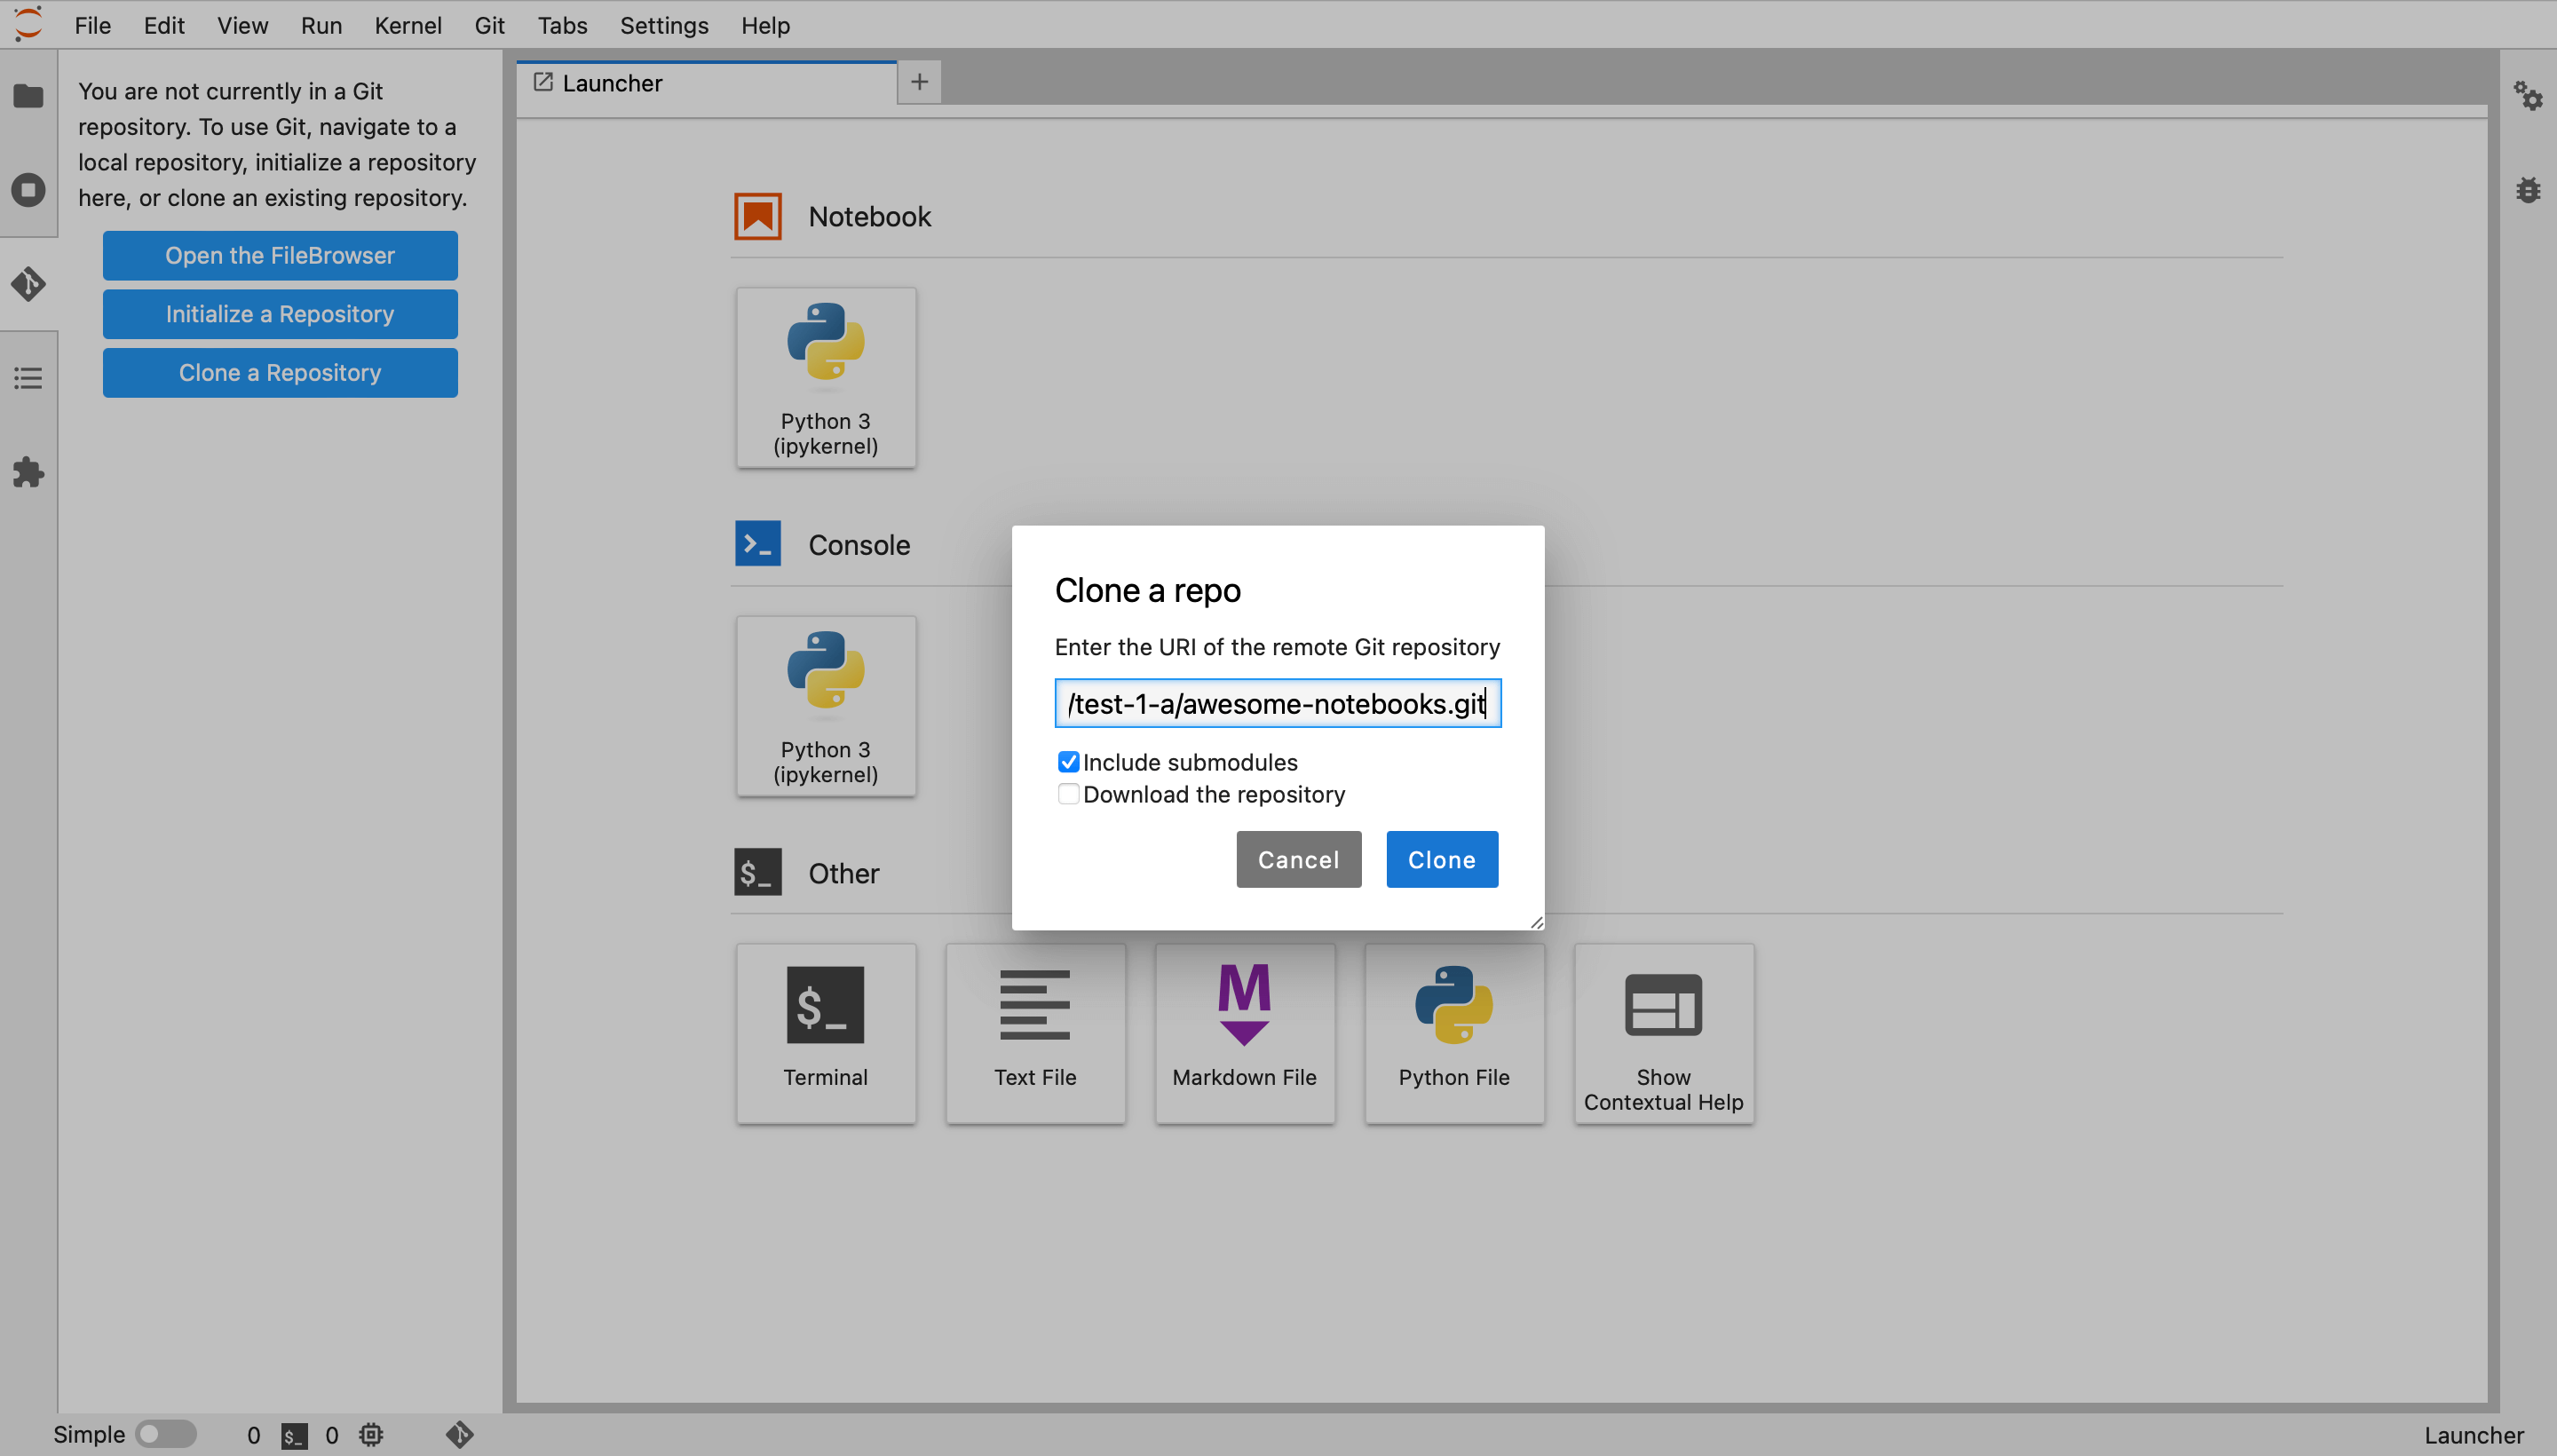
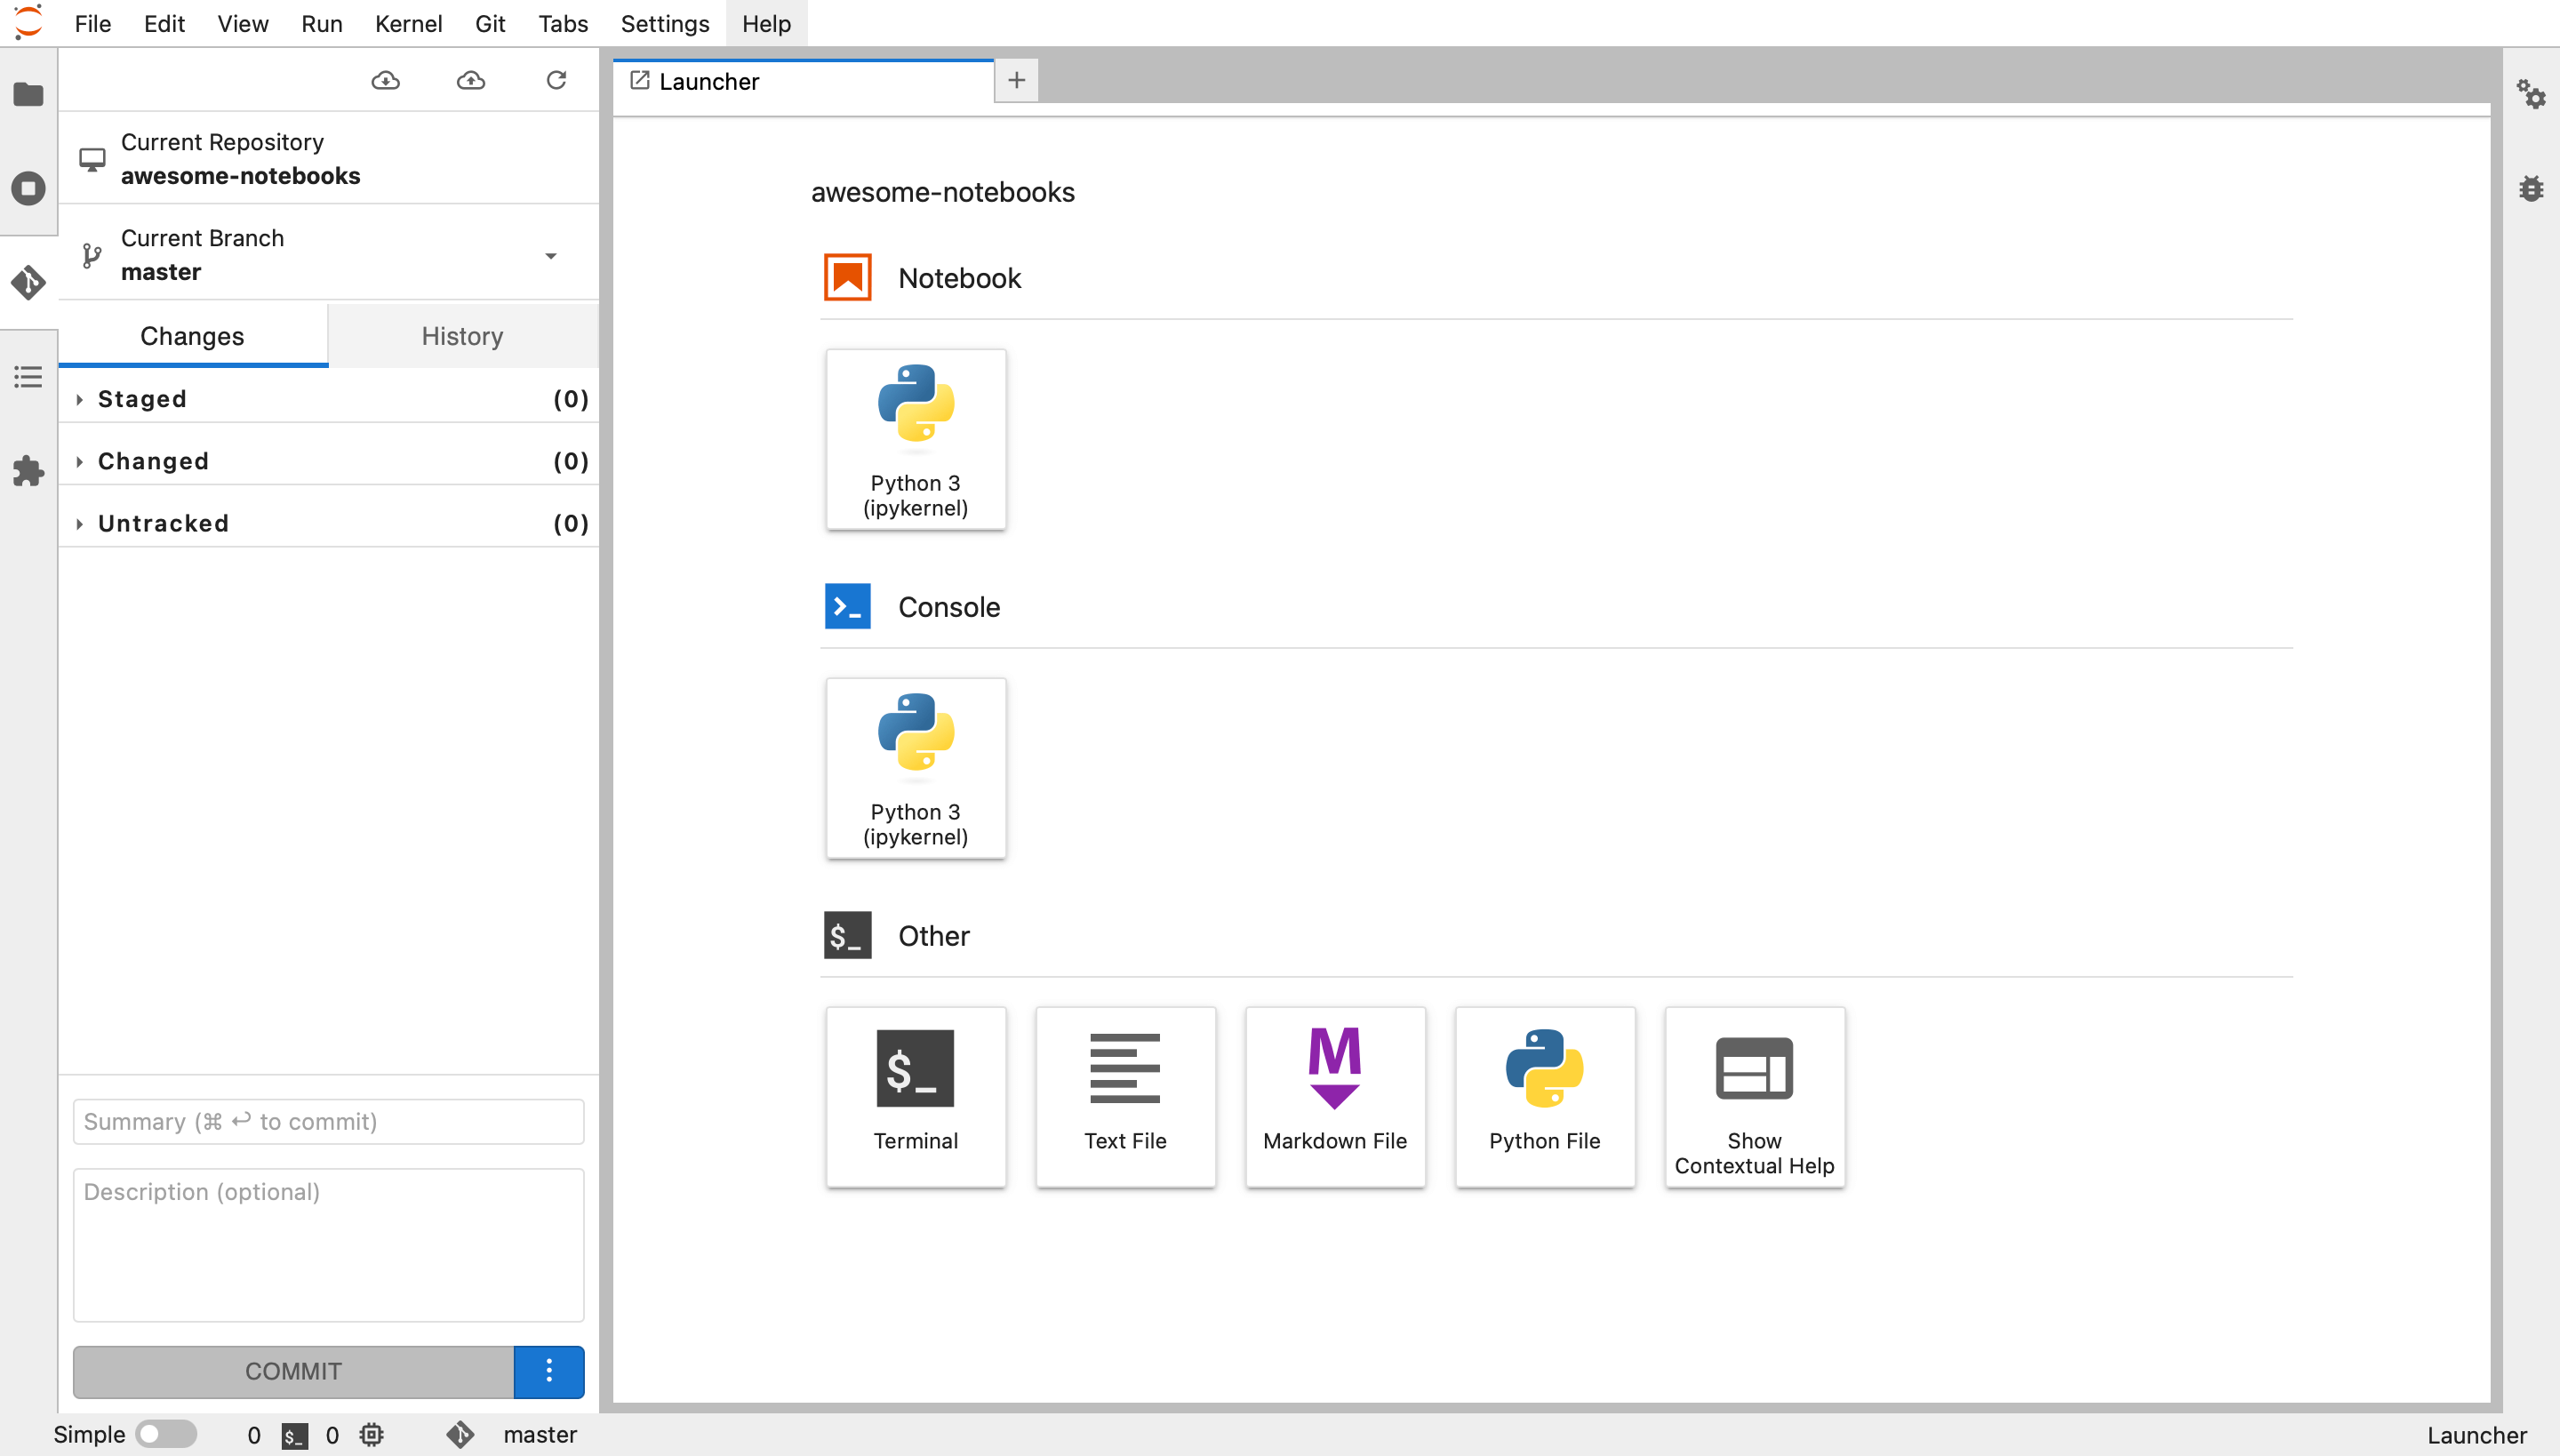
Click on the Clone a Repository button on the JupyterLab Git extension panel and paste the repository link we copied above:
Now the repository is cloned to your local machine & you can see the awesome-notebooks folder in the navigation panel.
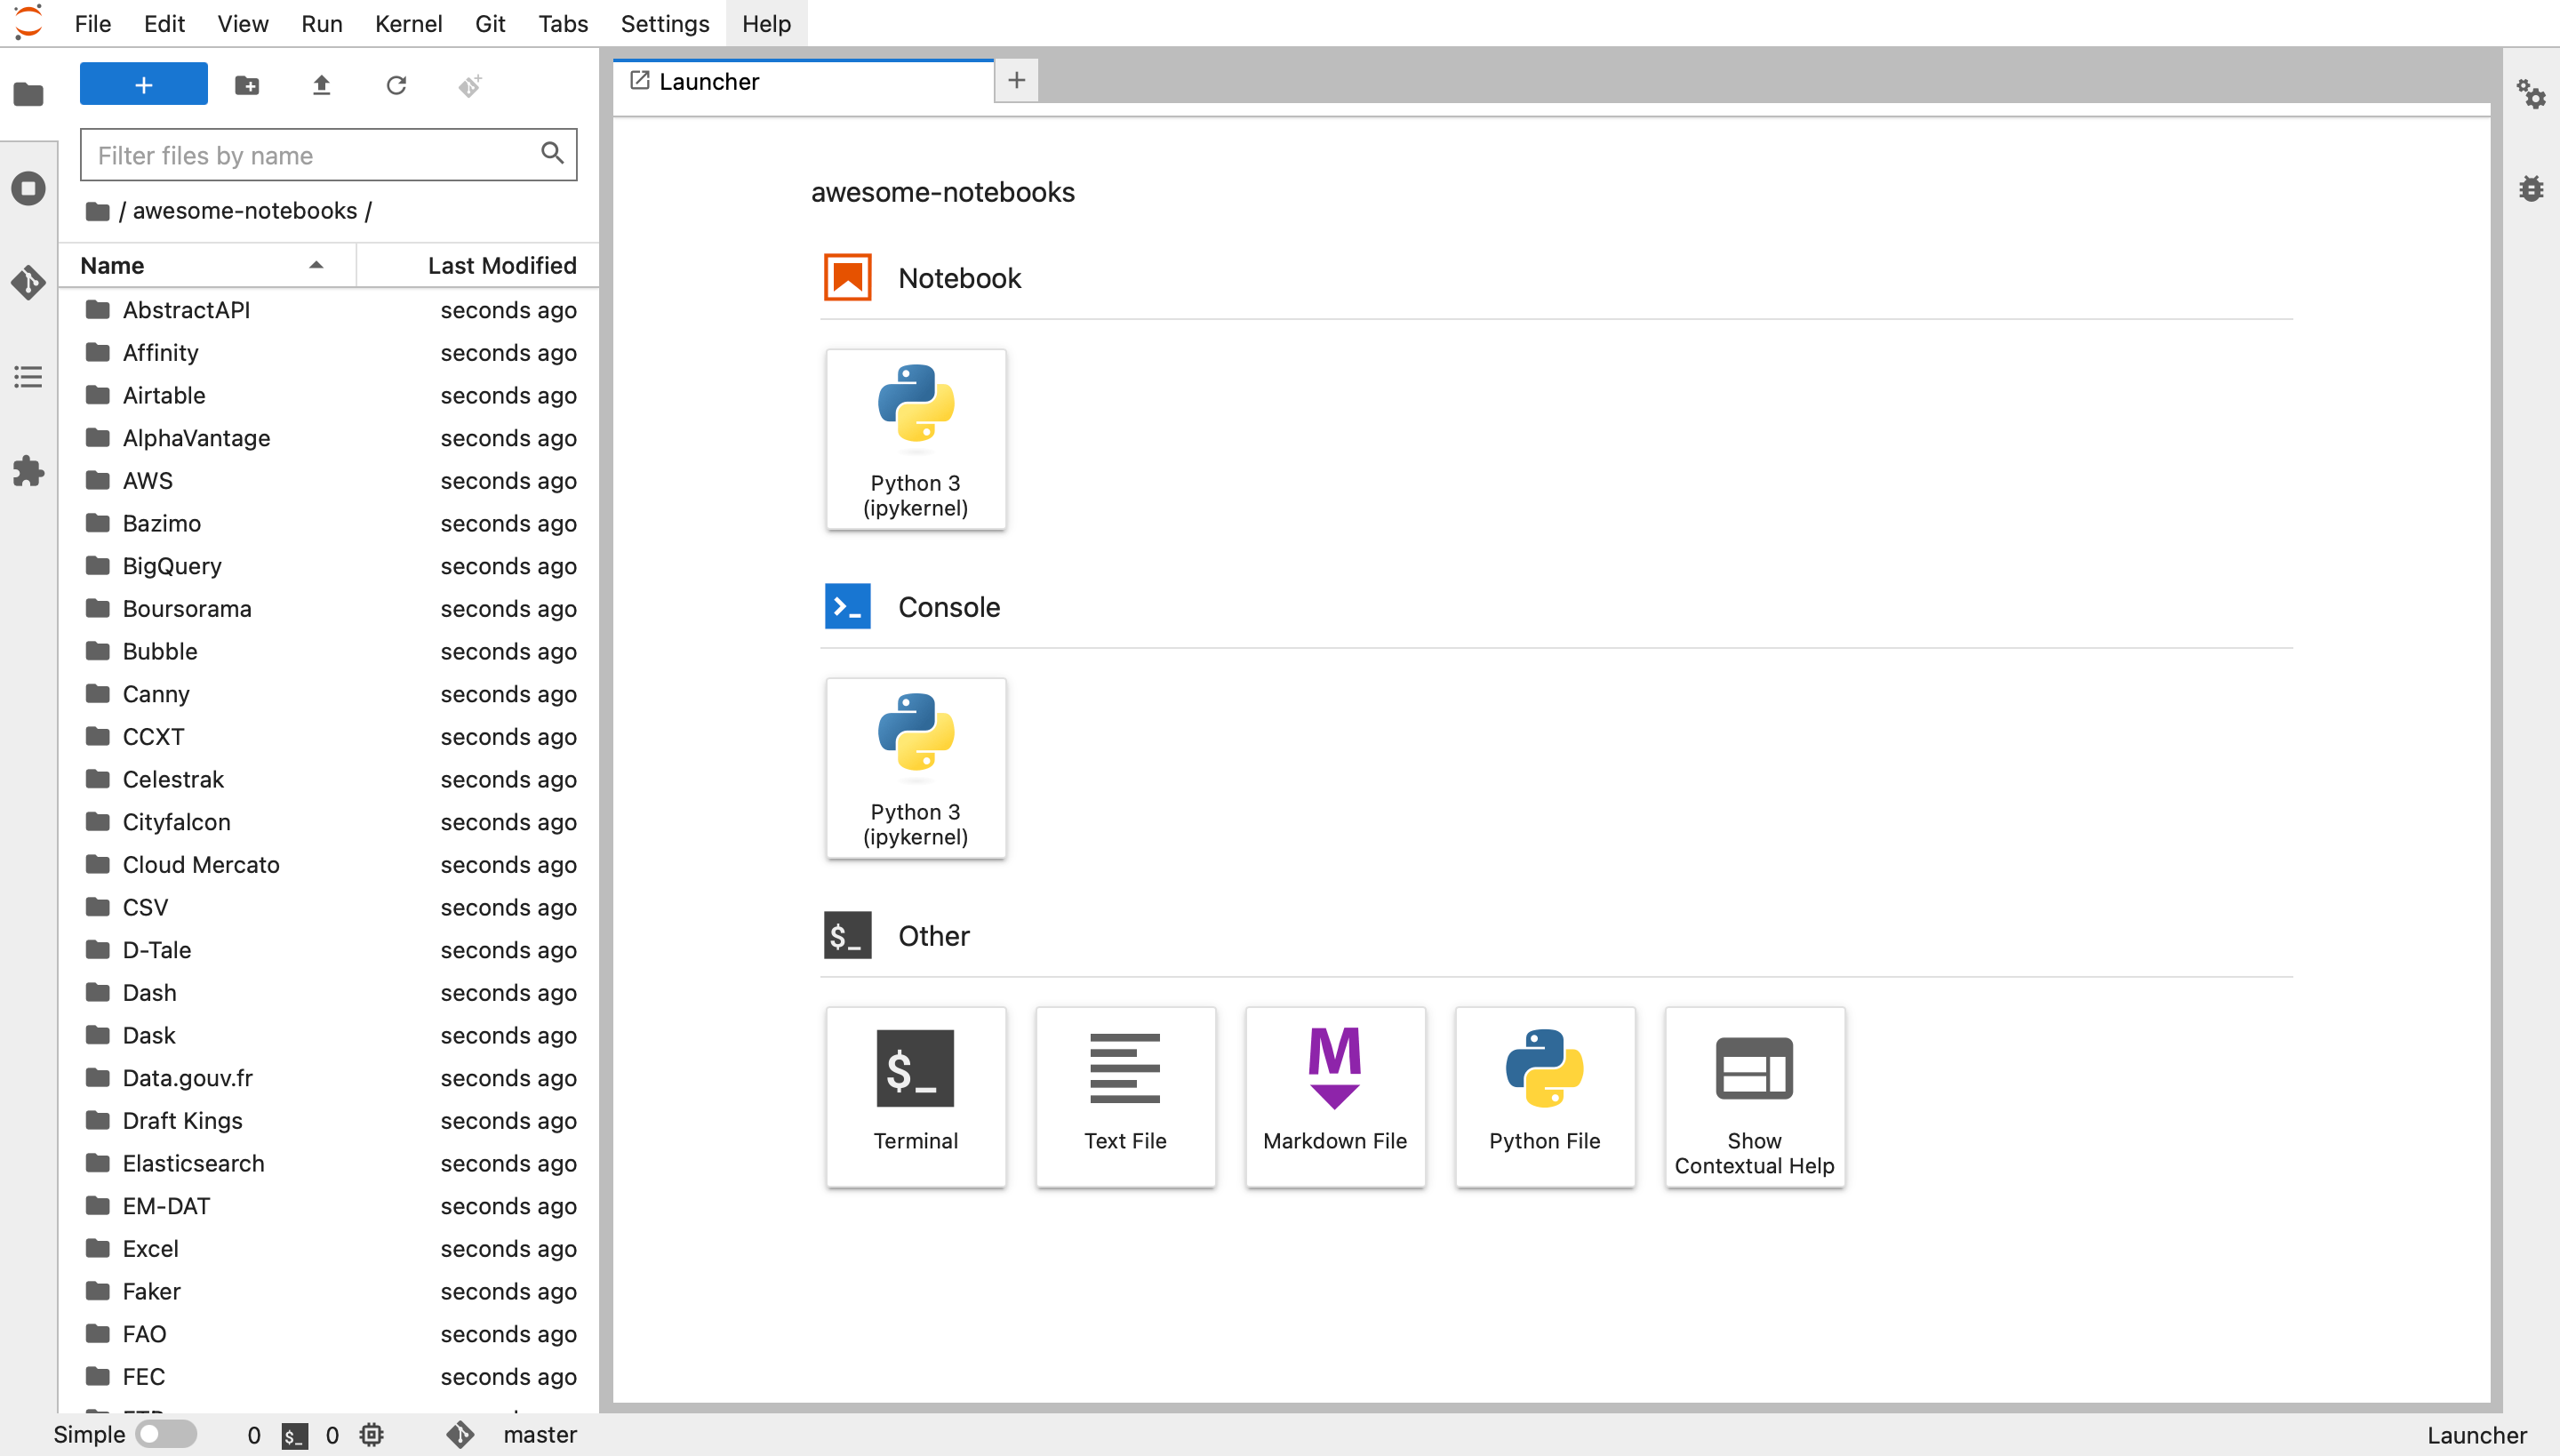
Navigate to the awesome-notebooks folder and click on the Git icon on the left-hand panel:
We are now in a Git repository, so the Git panel displays various Git information: which branch you are in, uncommitted changes you have made, and a panel to commit your changes.
Git workflow: branch
Before we edit any notebooks, let’s create a separate branch to track all of our changes.
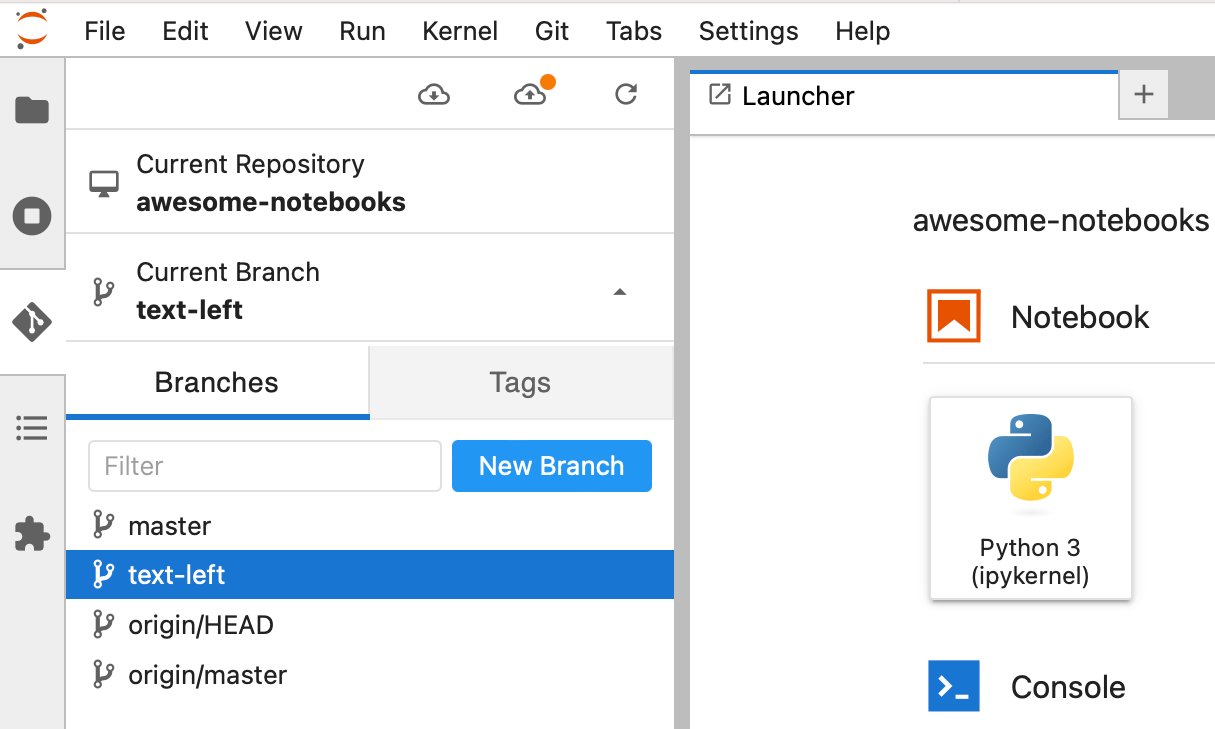
Create a new branch by navigating back to the Git panel. Click on the “Current Branch” panel, then the “New Branch” button.

We’ll call our branch text-left:
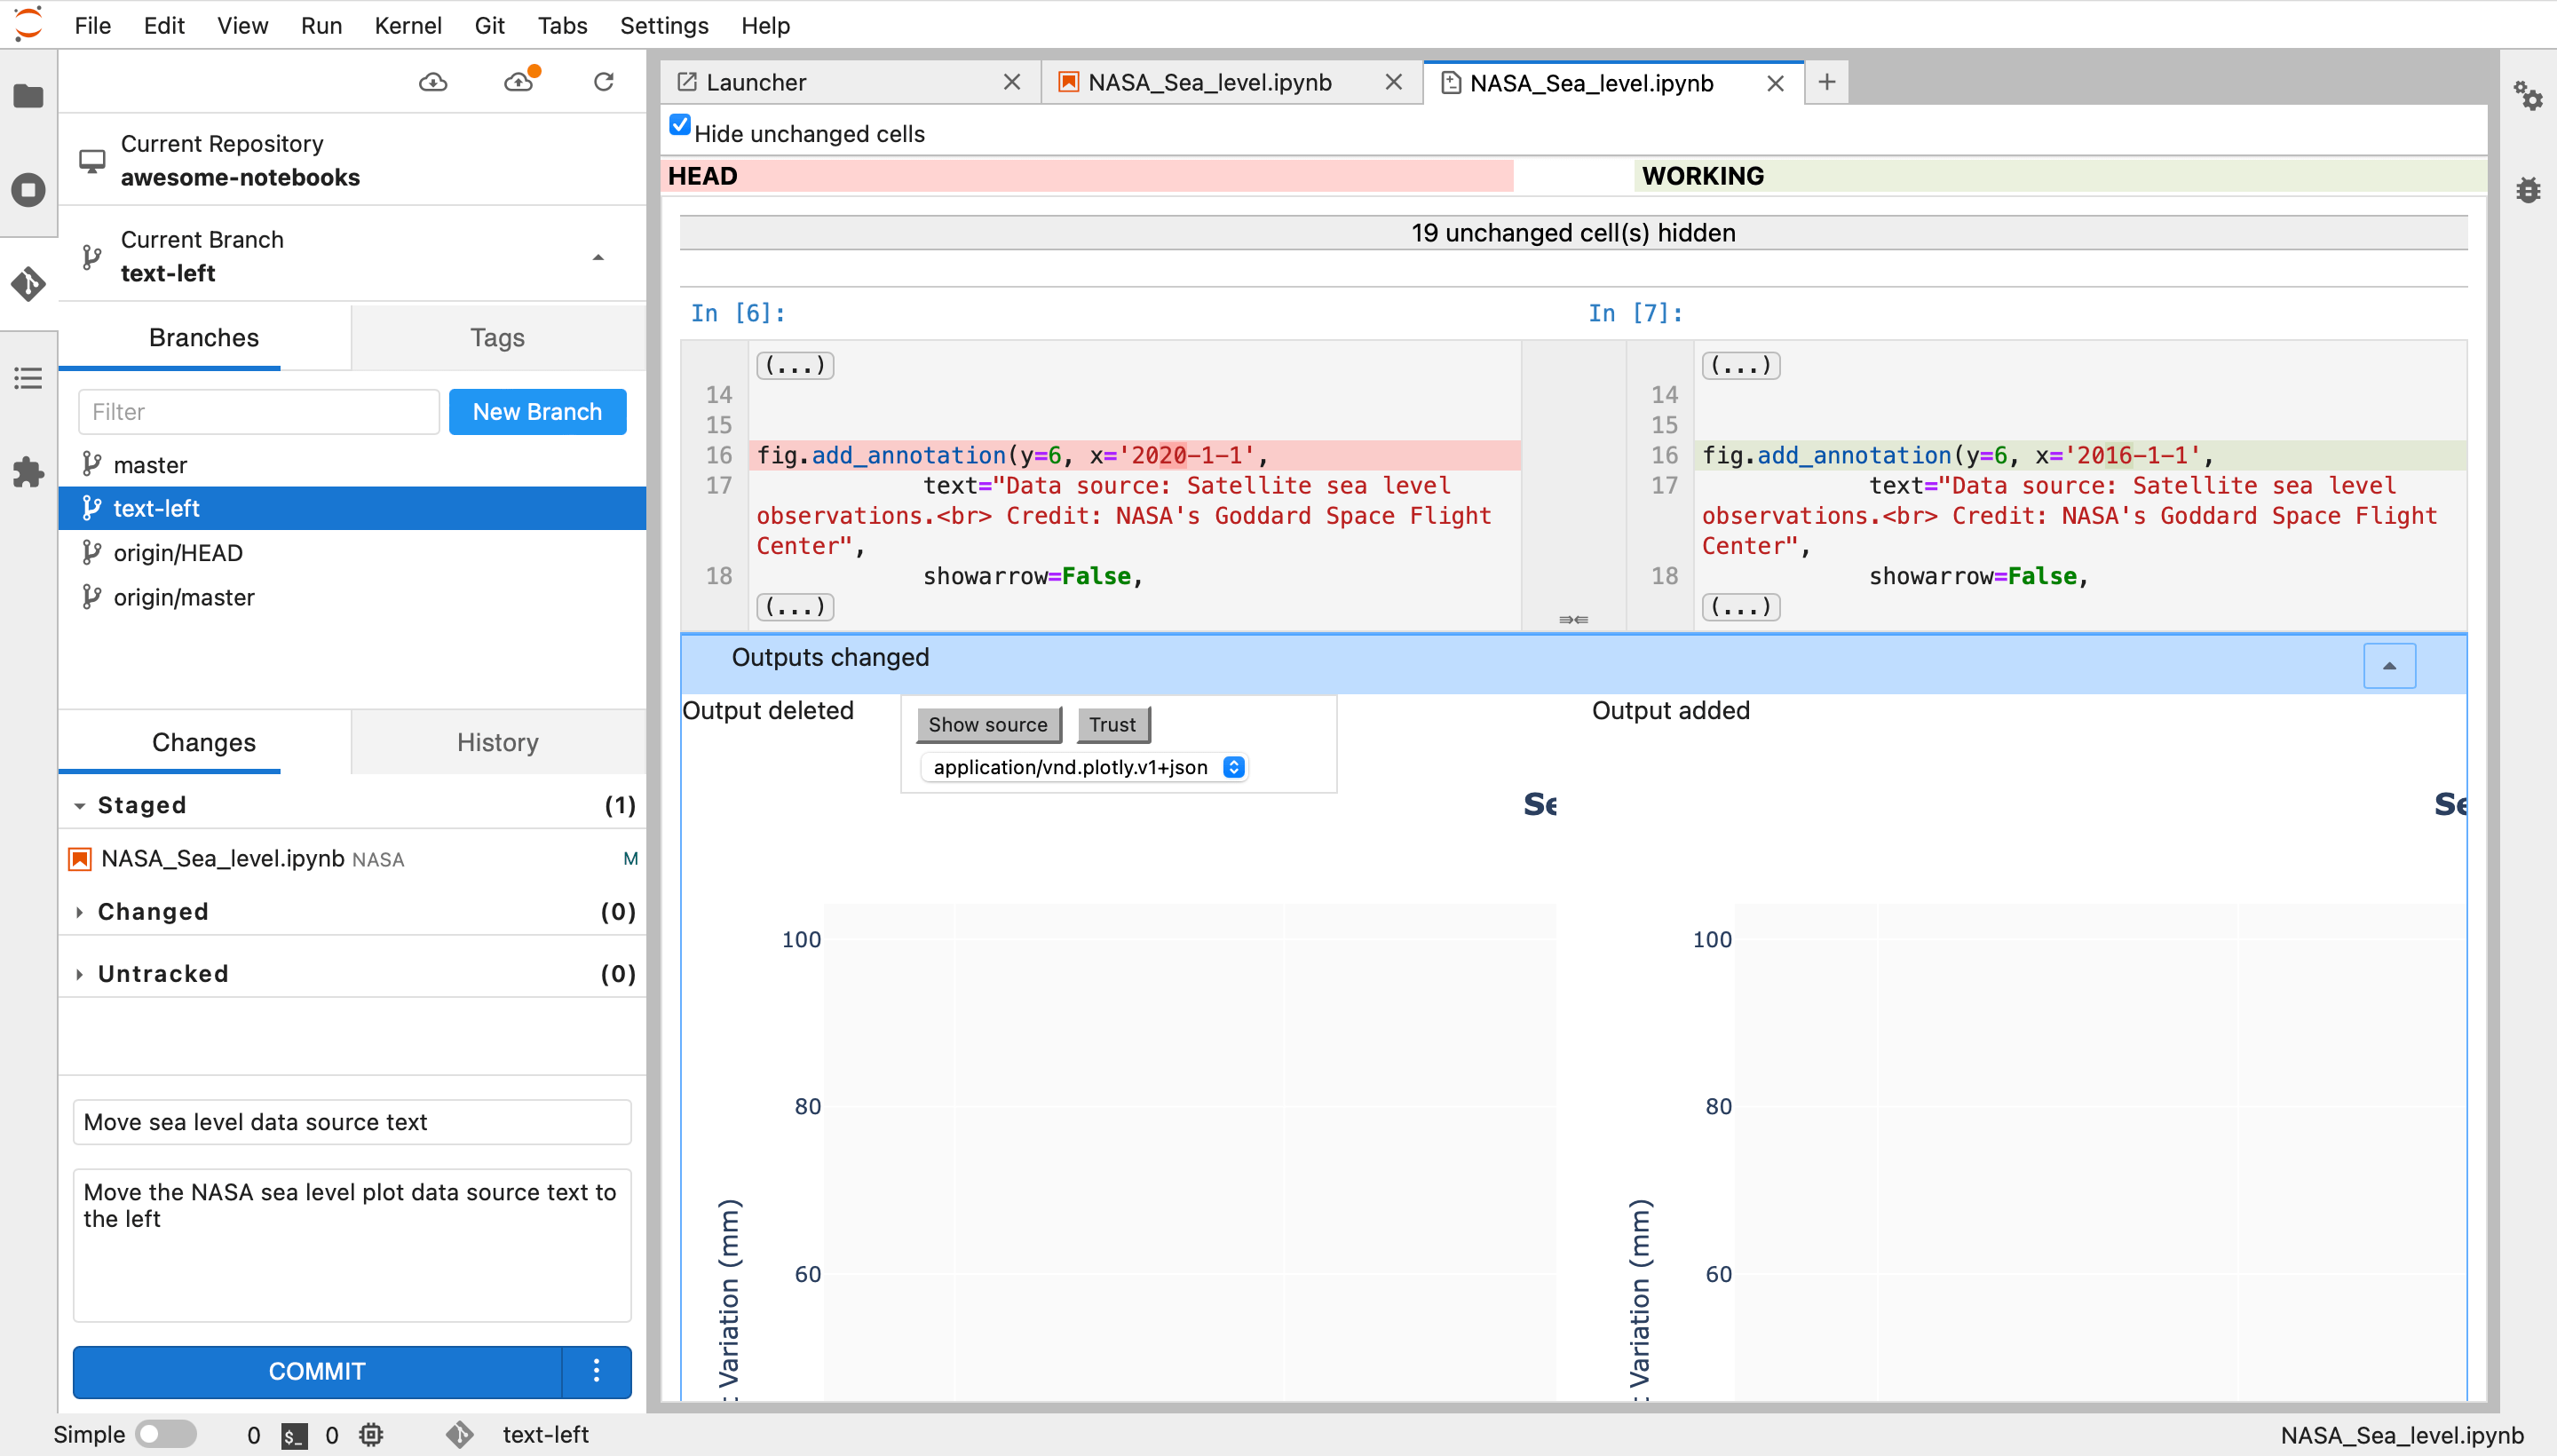
Git workflow: diff
Now let’s edit a notebook called NASA_Sea_level.ipynb. Our change will move the “data source” text further left on the plot. Once you have
made the change and saved the notebook, you’ll see the notebook listed under “Changed”.
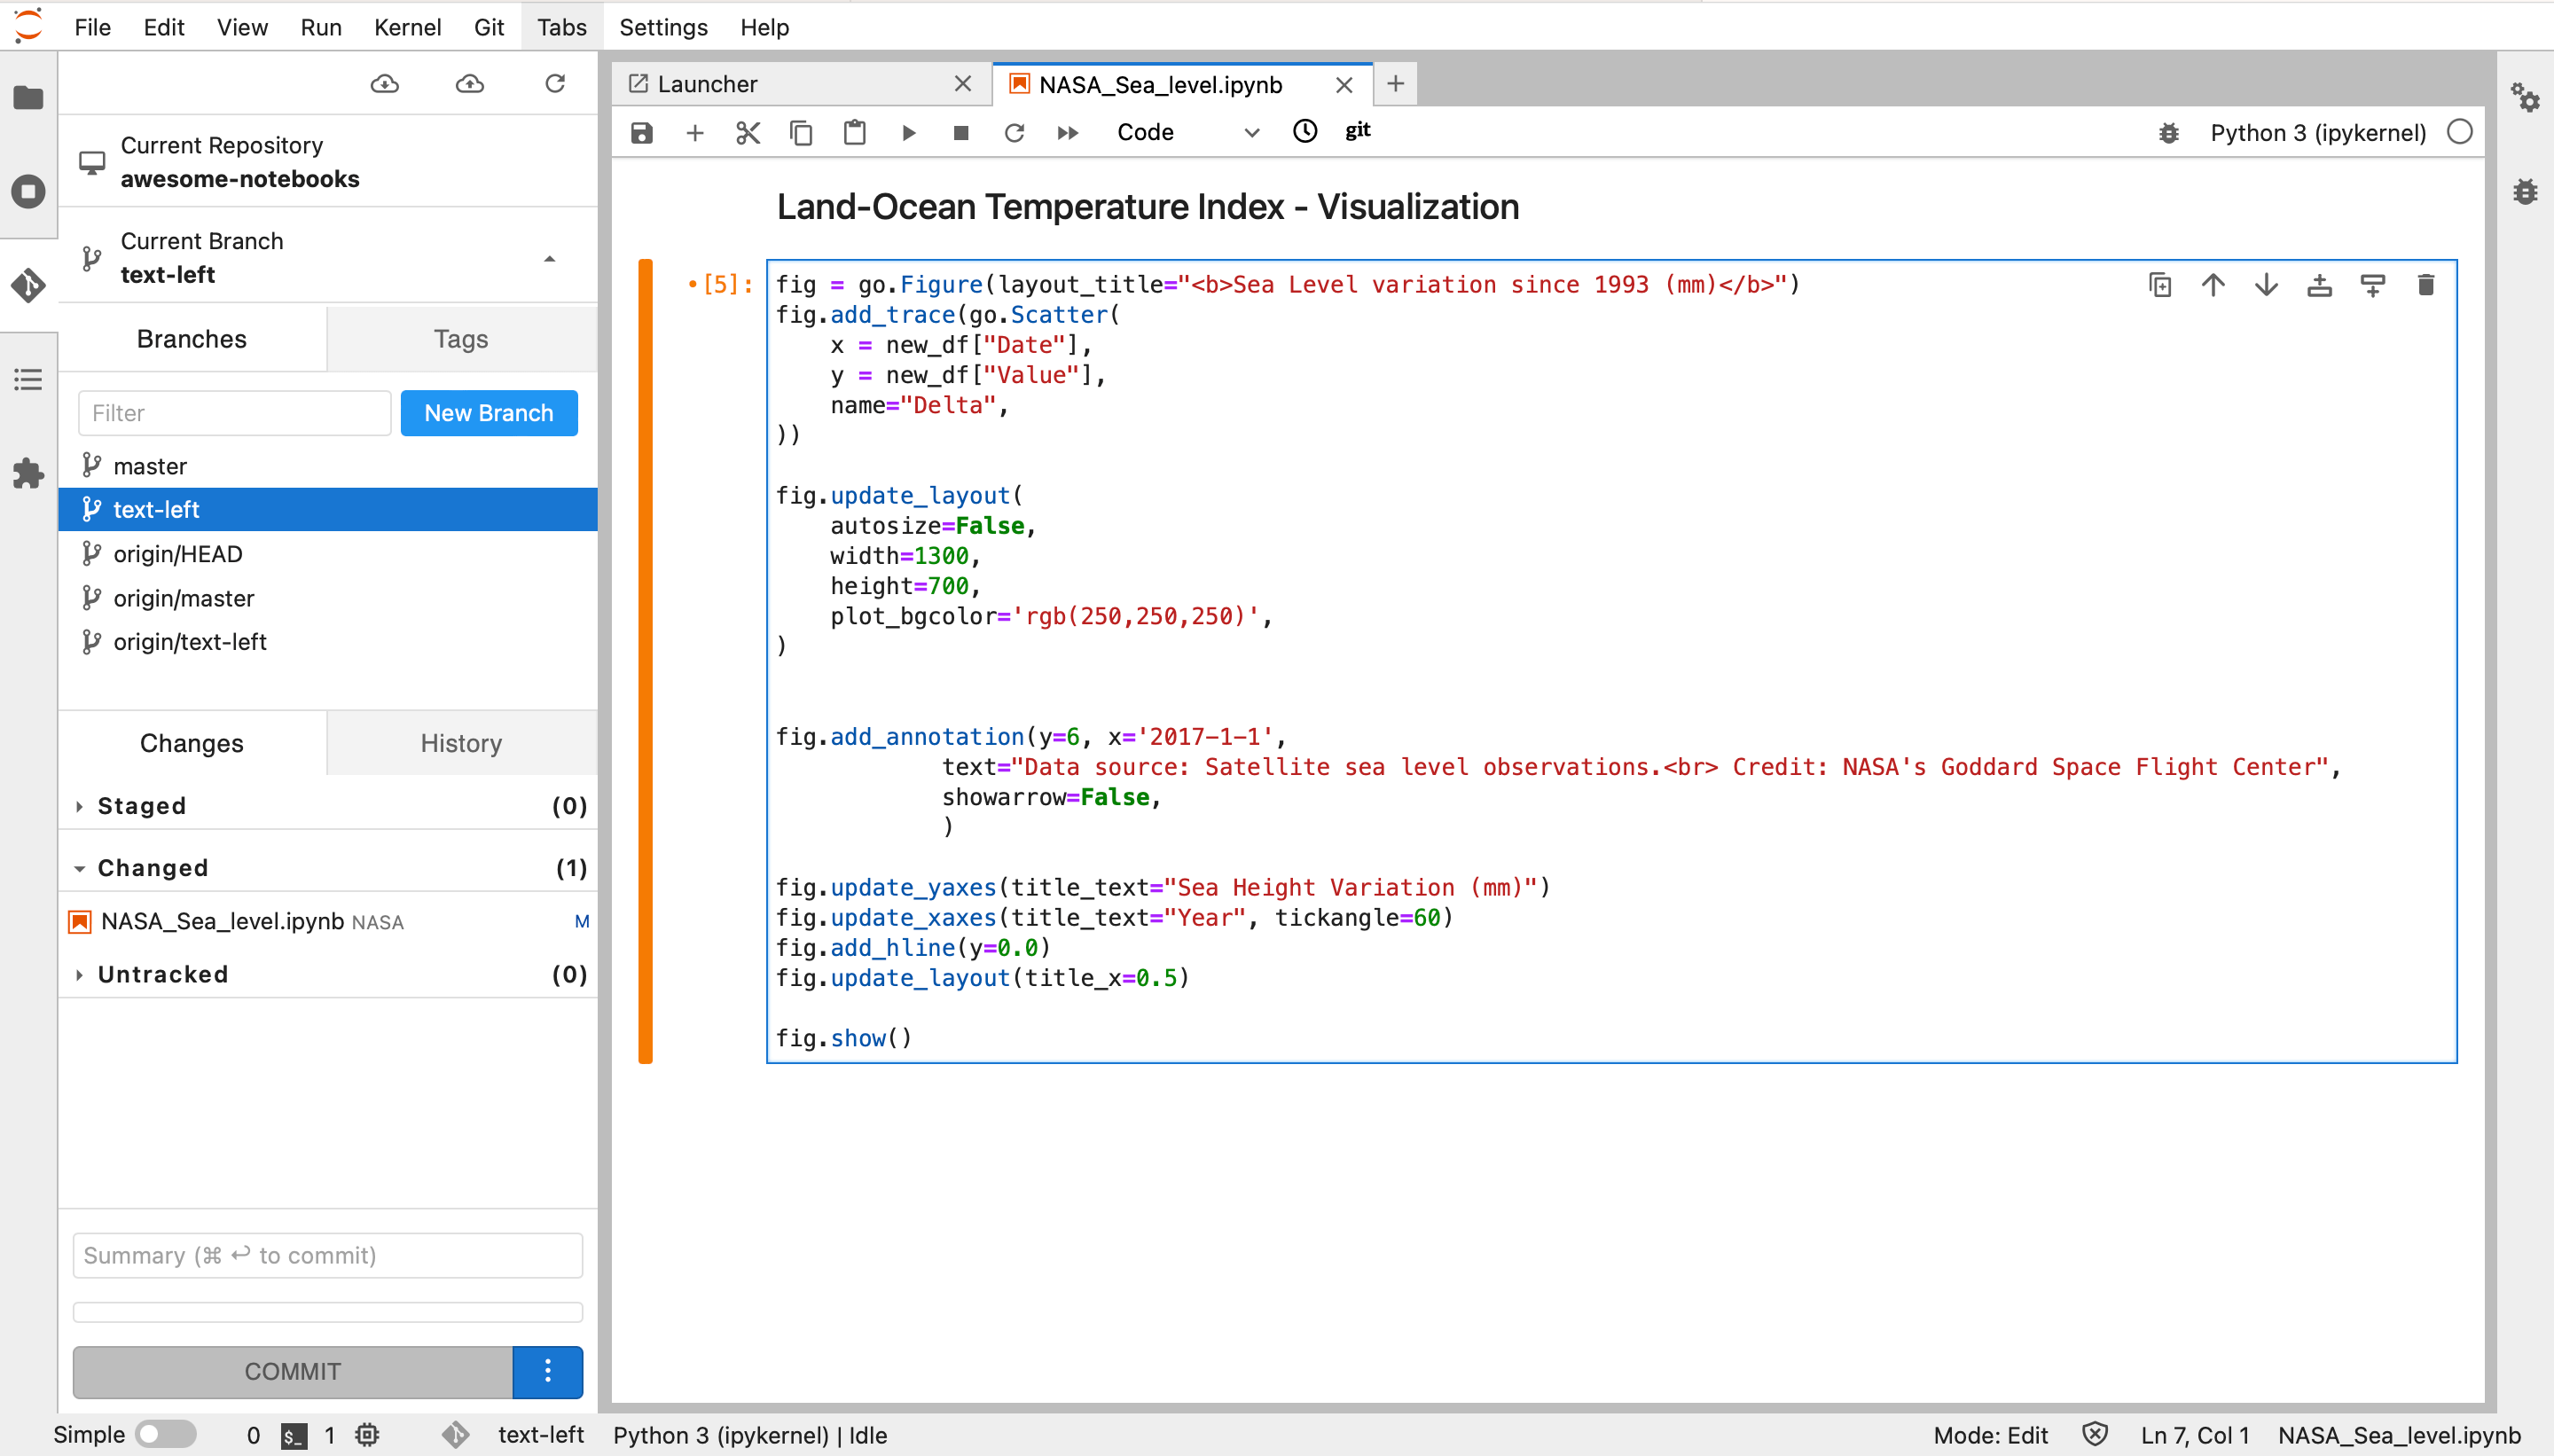
If you hover over the name of the changed file, you’ll see the icons to: open the file; view the diff between the current branch and your change; revert the changes, and stage the change.
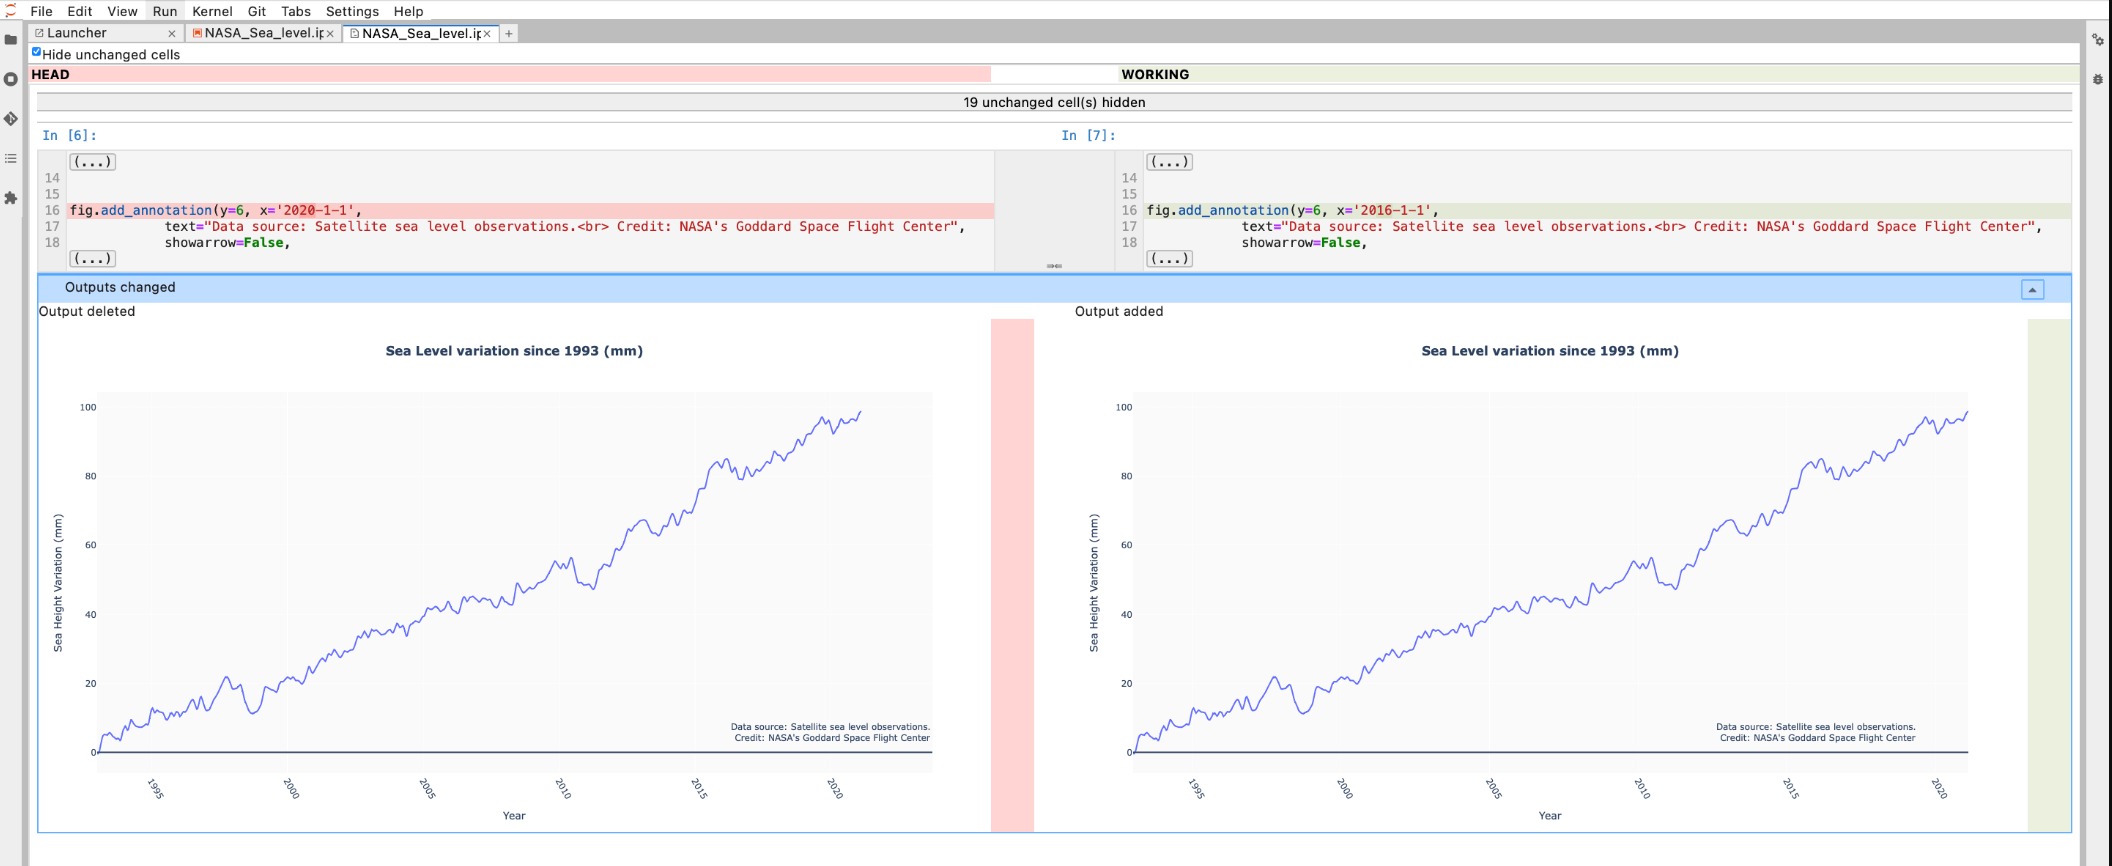
Let’s check out the rich notebook diff that the JupyterLab Git extension shows. It’s powered by nbdime under the hood, so you compare rendered notebook cells side by side instead of raw .ipynb JSON -
Git workflow: commit
In the diff, we can see the edit we made to the plotting line. If the change looks satisfactory, we can commit the change by hovering over the name of the changed file under “Changed” and clicking the + icon. Enter a commit message and click on “COMMIT”. This creates a local commit / checkpoint.
Git workflow: push
Now we push our local commit to the remote GitHub repository. Have a look at the screenshot below -
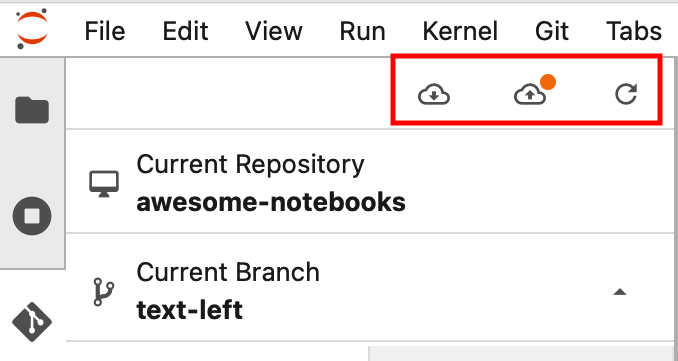
The cloud on the left pulls the latest changes to your local branch. Conversely, the cloud on the right pushes local changes to remote repository.
The right-hand cloud now has a red dot over it indicating un-pushed changes. Let’s click on the right-hand cloud to push our changes to GitHub. This will push our newly created branch text-left to the remote GitHub repository. The branch contains the changes we made to the NASA_Sea_level.ipynb notebook.
Git workflow: merge conflict
Merge conflicts are where notebook version control usually hurts most — the .ipynb JSON makes conflicts hard to resolve (the advanced Git ↔ Jupyter guide covers why). The extension gives you a visual way through one.
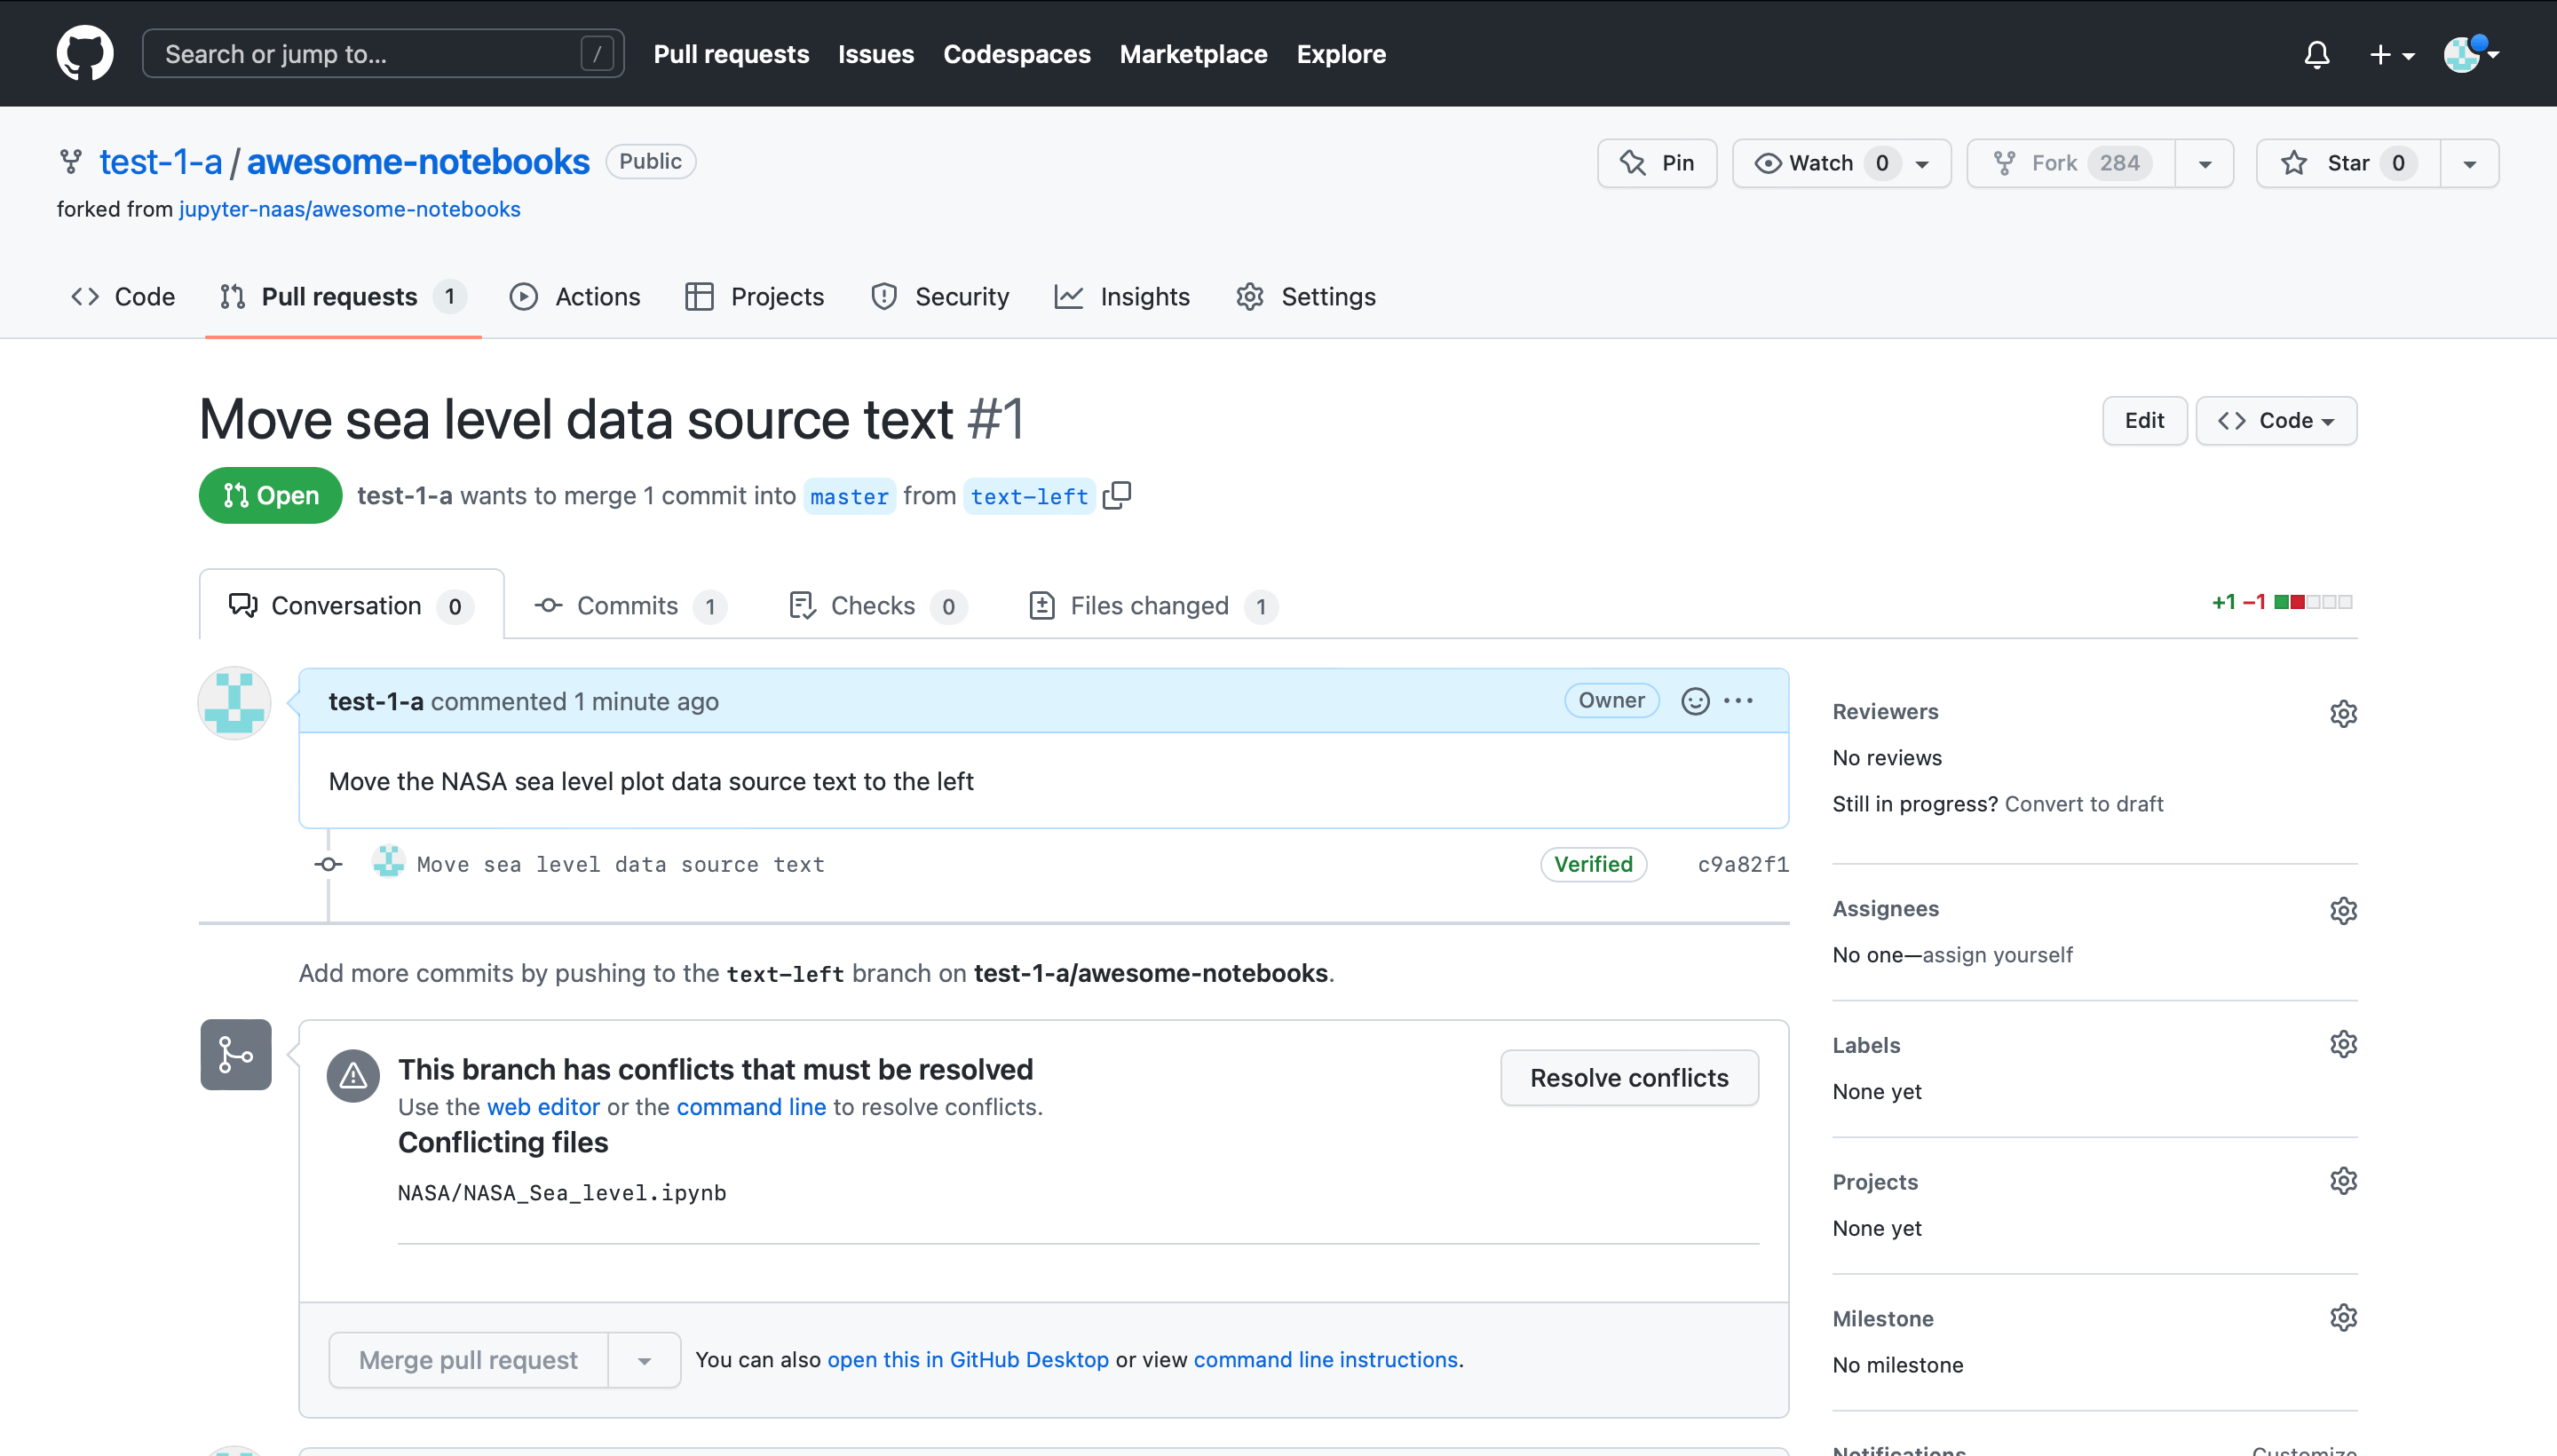
Perhaps there was some miscommunication in your team. Before you had a chance to merge your changes in the master branch, one of your colleagues went ahead and changed the plot text and issued a pull request before you.
You disagree with her choice of plot end date, so you still want to make a pull request with your change. Now when you make a pull request from your branch, there is a conflict:
If you change back to the master branch on JupyterLab now, a pop-up will appear to let you know that the remote version file has changed:
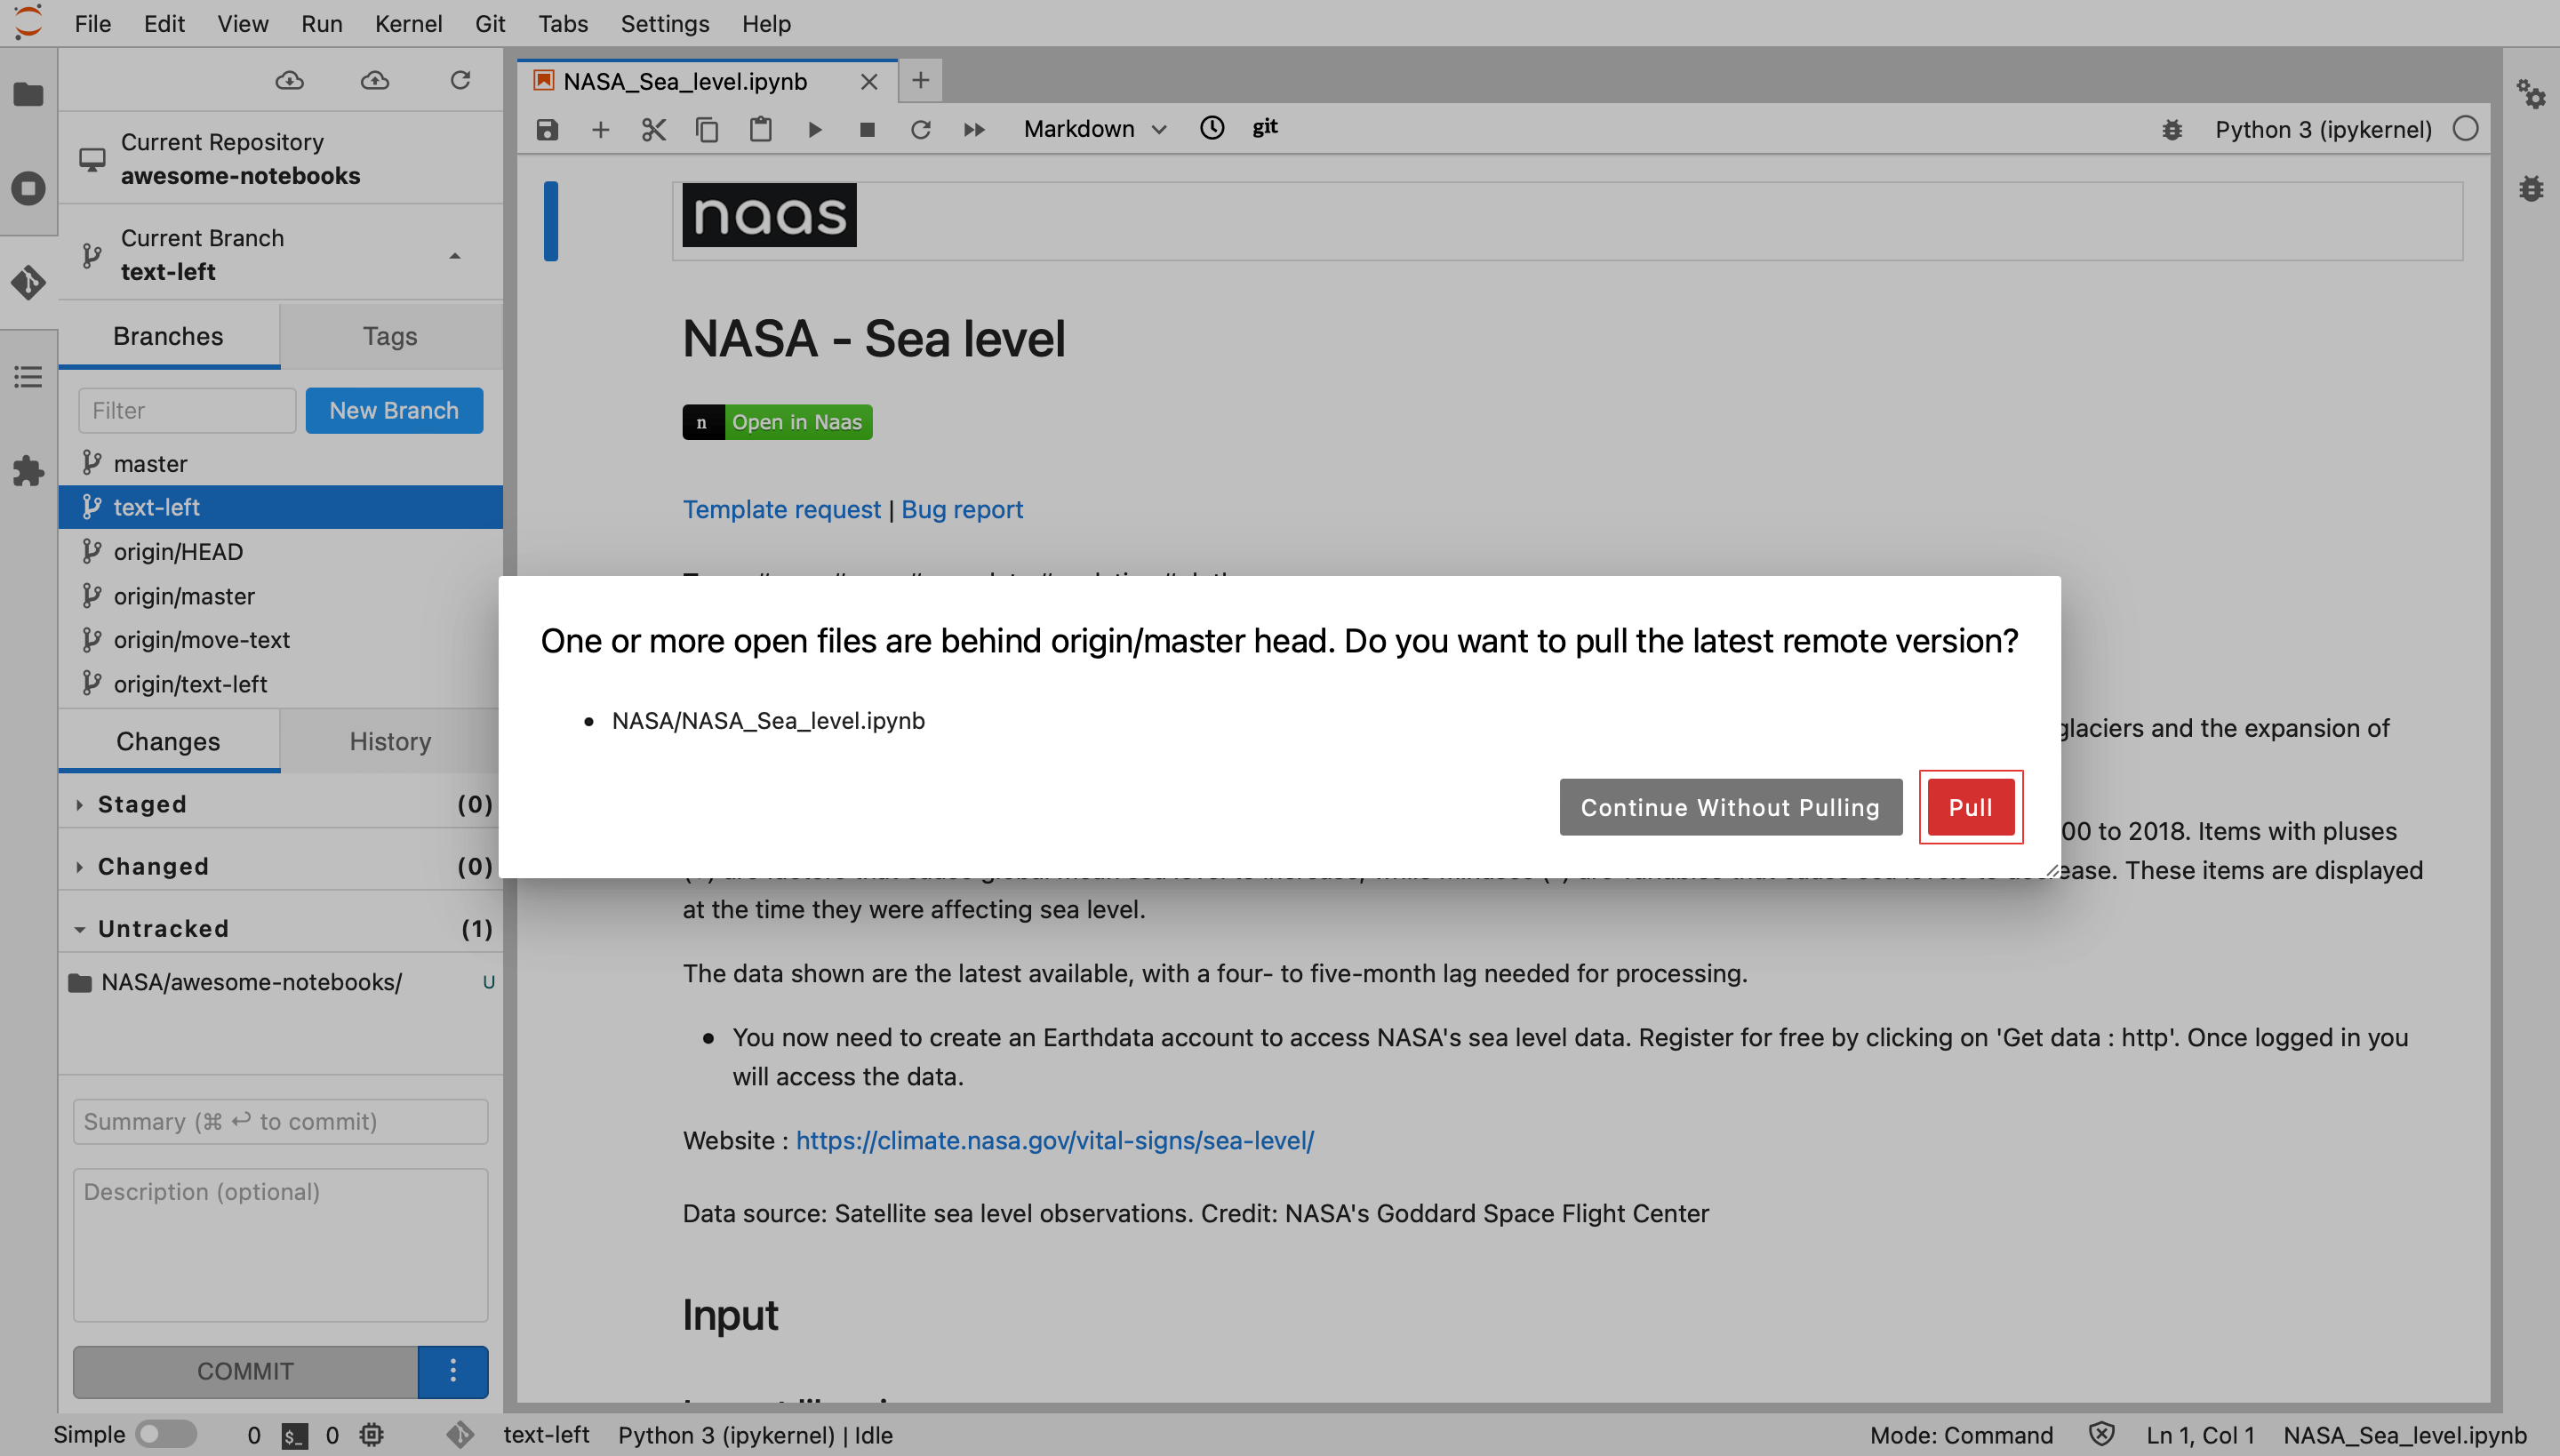
Let’s go ahead and pull the latest changes to master made by your colleague.
Then change back to the text-left branch, so we can merge the master updates into our branch.
Click on the Git option in the taskbar and choose “Merge Branch”, then select the master branch to merge into your text-left branch:
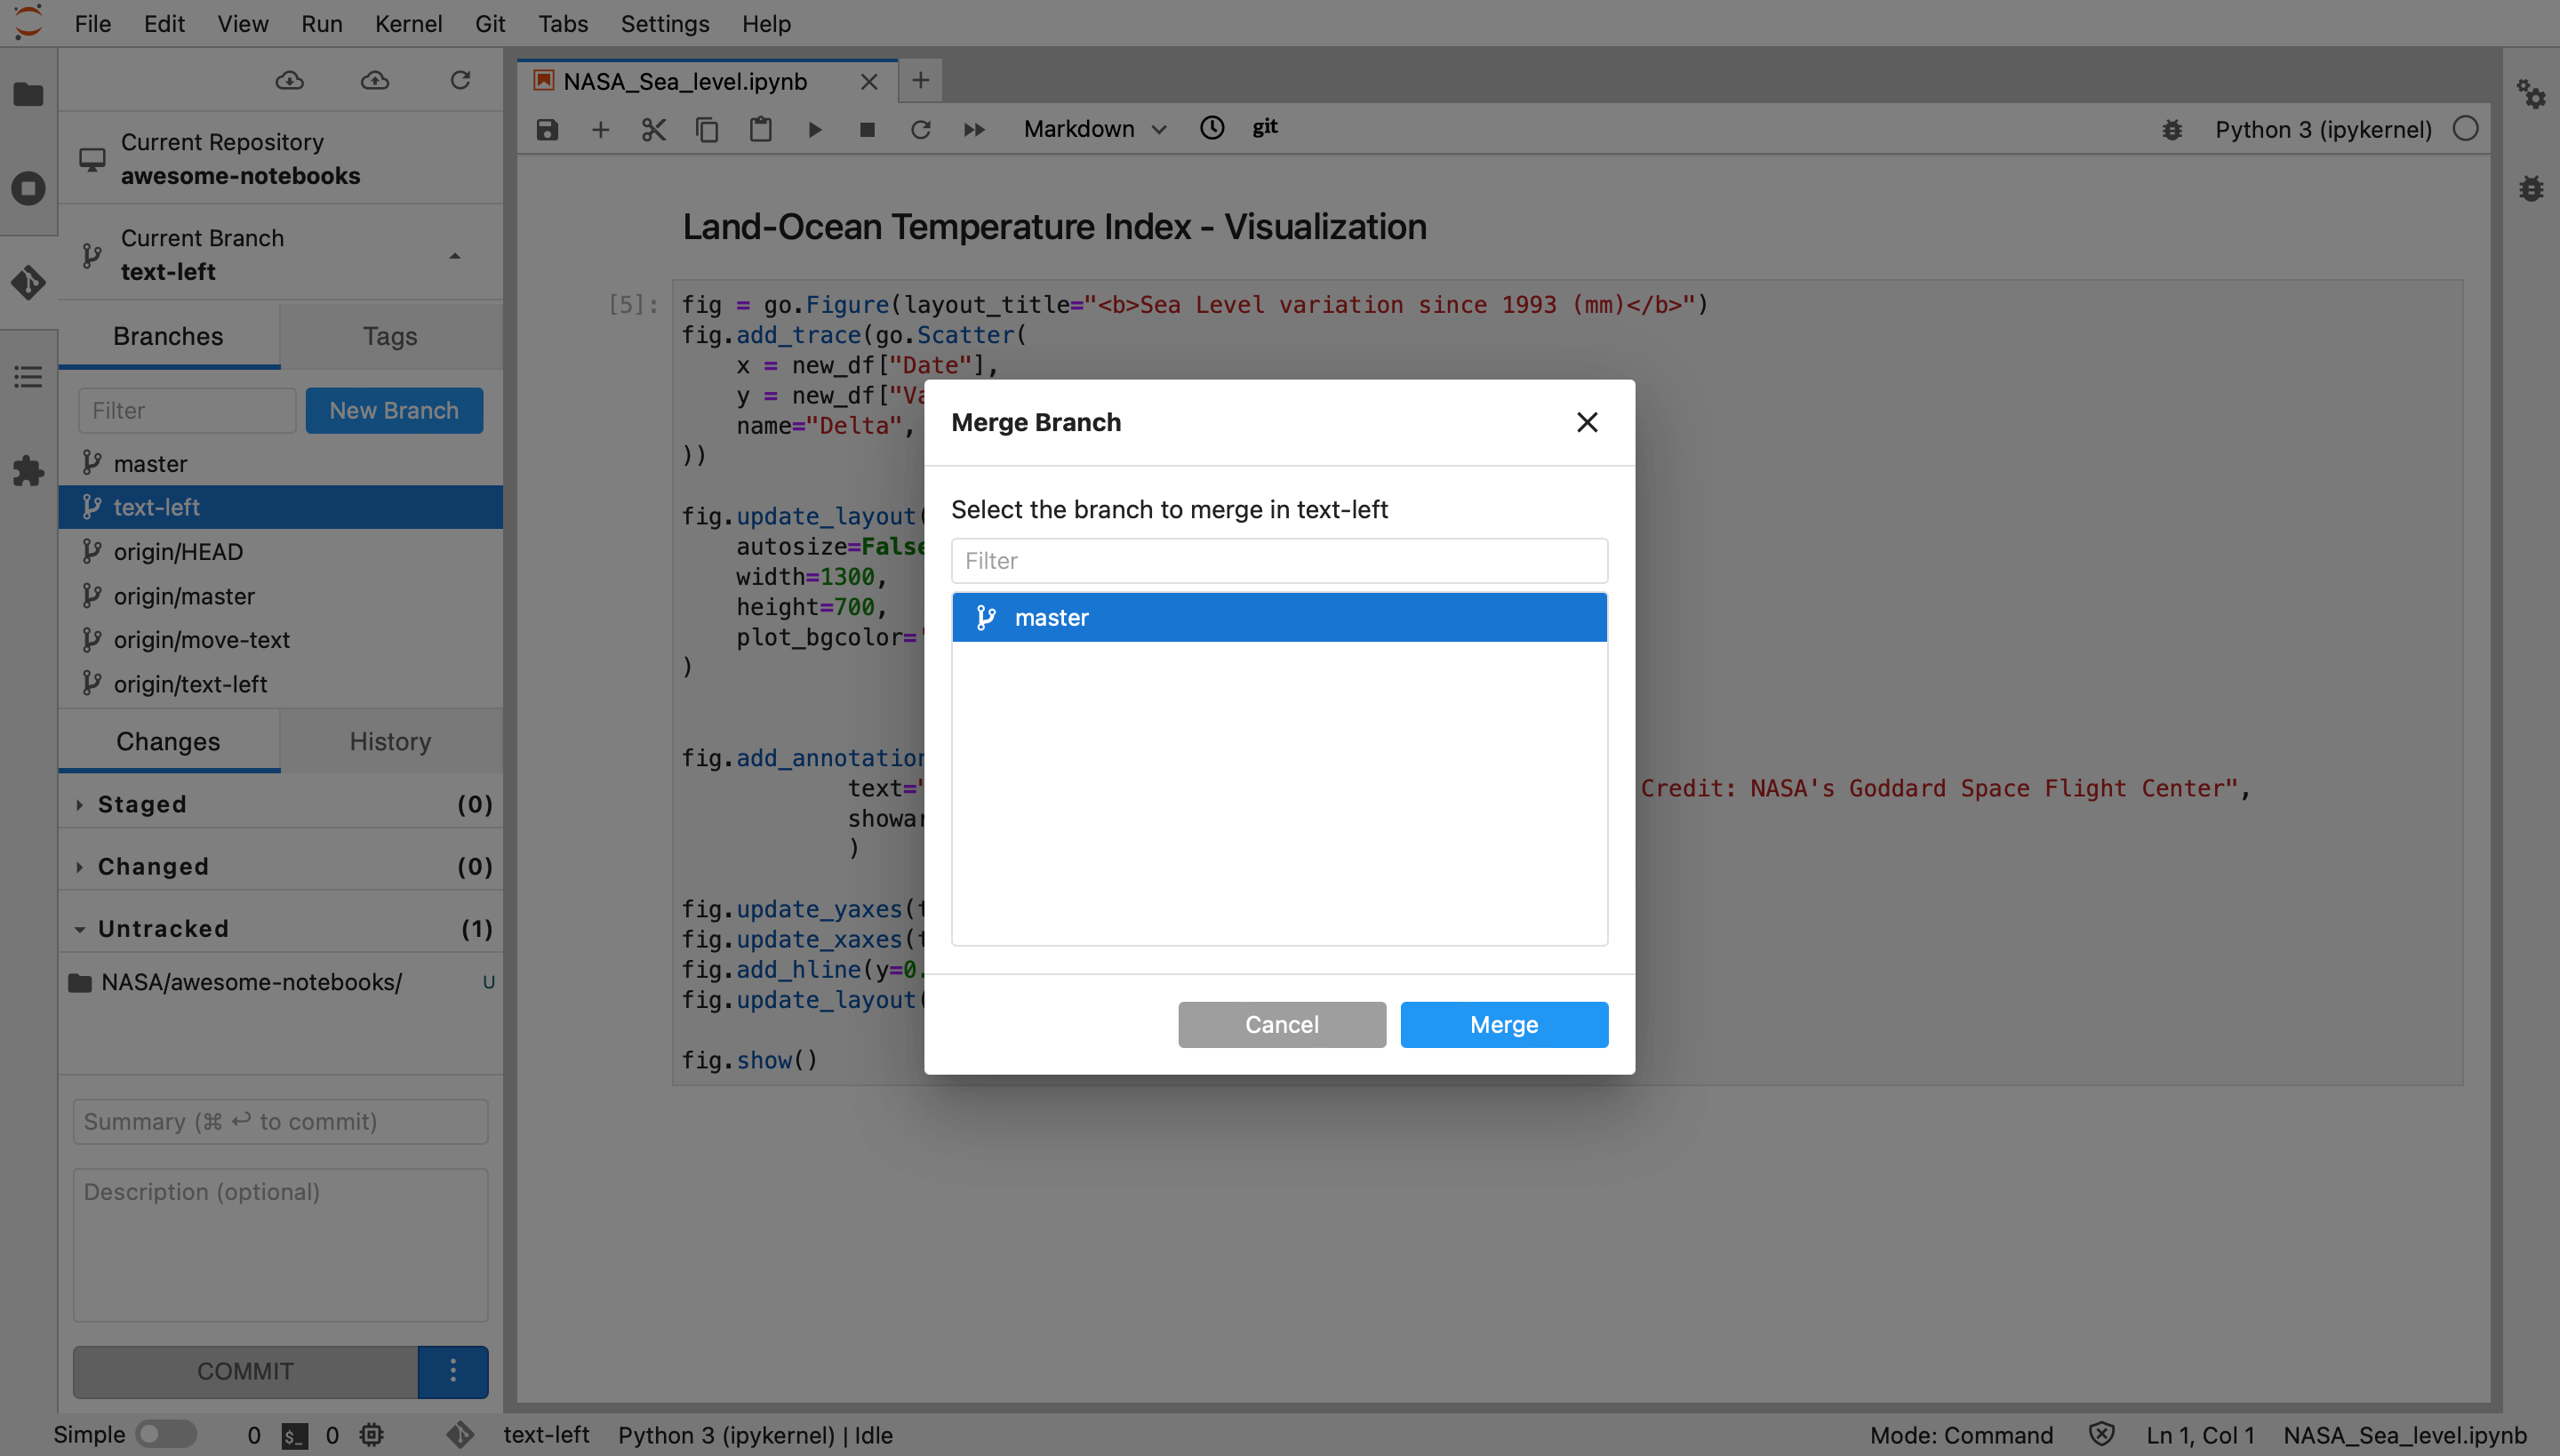
This action will fail and you will see the NASA_Sea_level.ipynb notebook appear in the “Conflicted” section of the left-hand Git panel. Double-click to view the conflict. You will see the three versions: the changes we made in our current branch, the original master, and the new master (updated by your colleague):
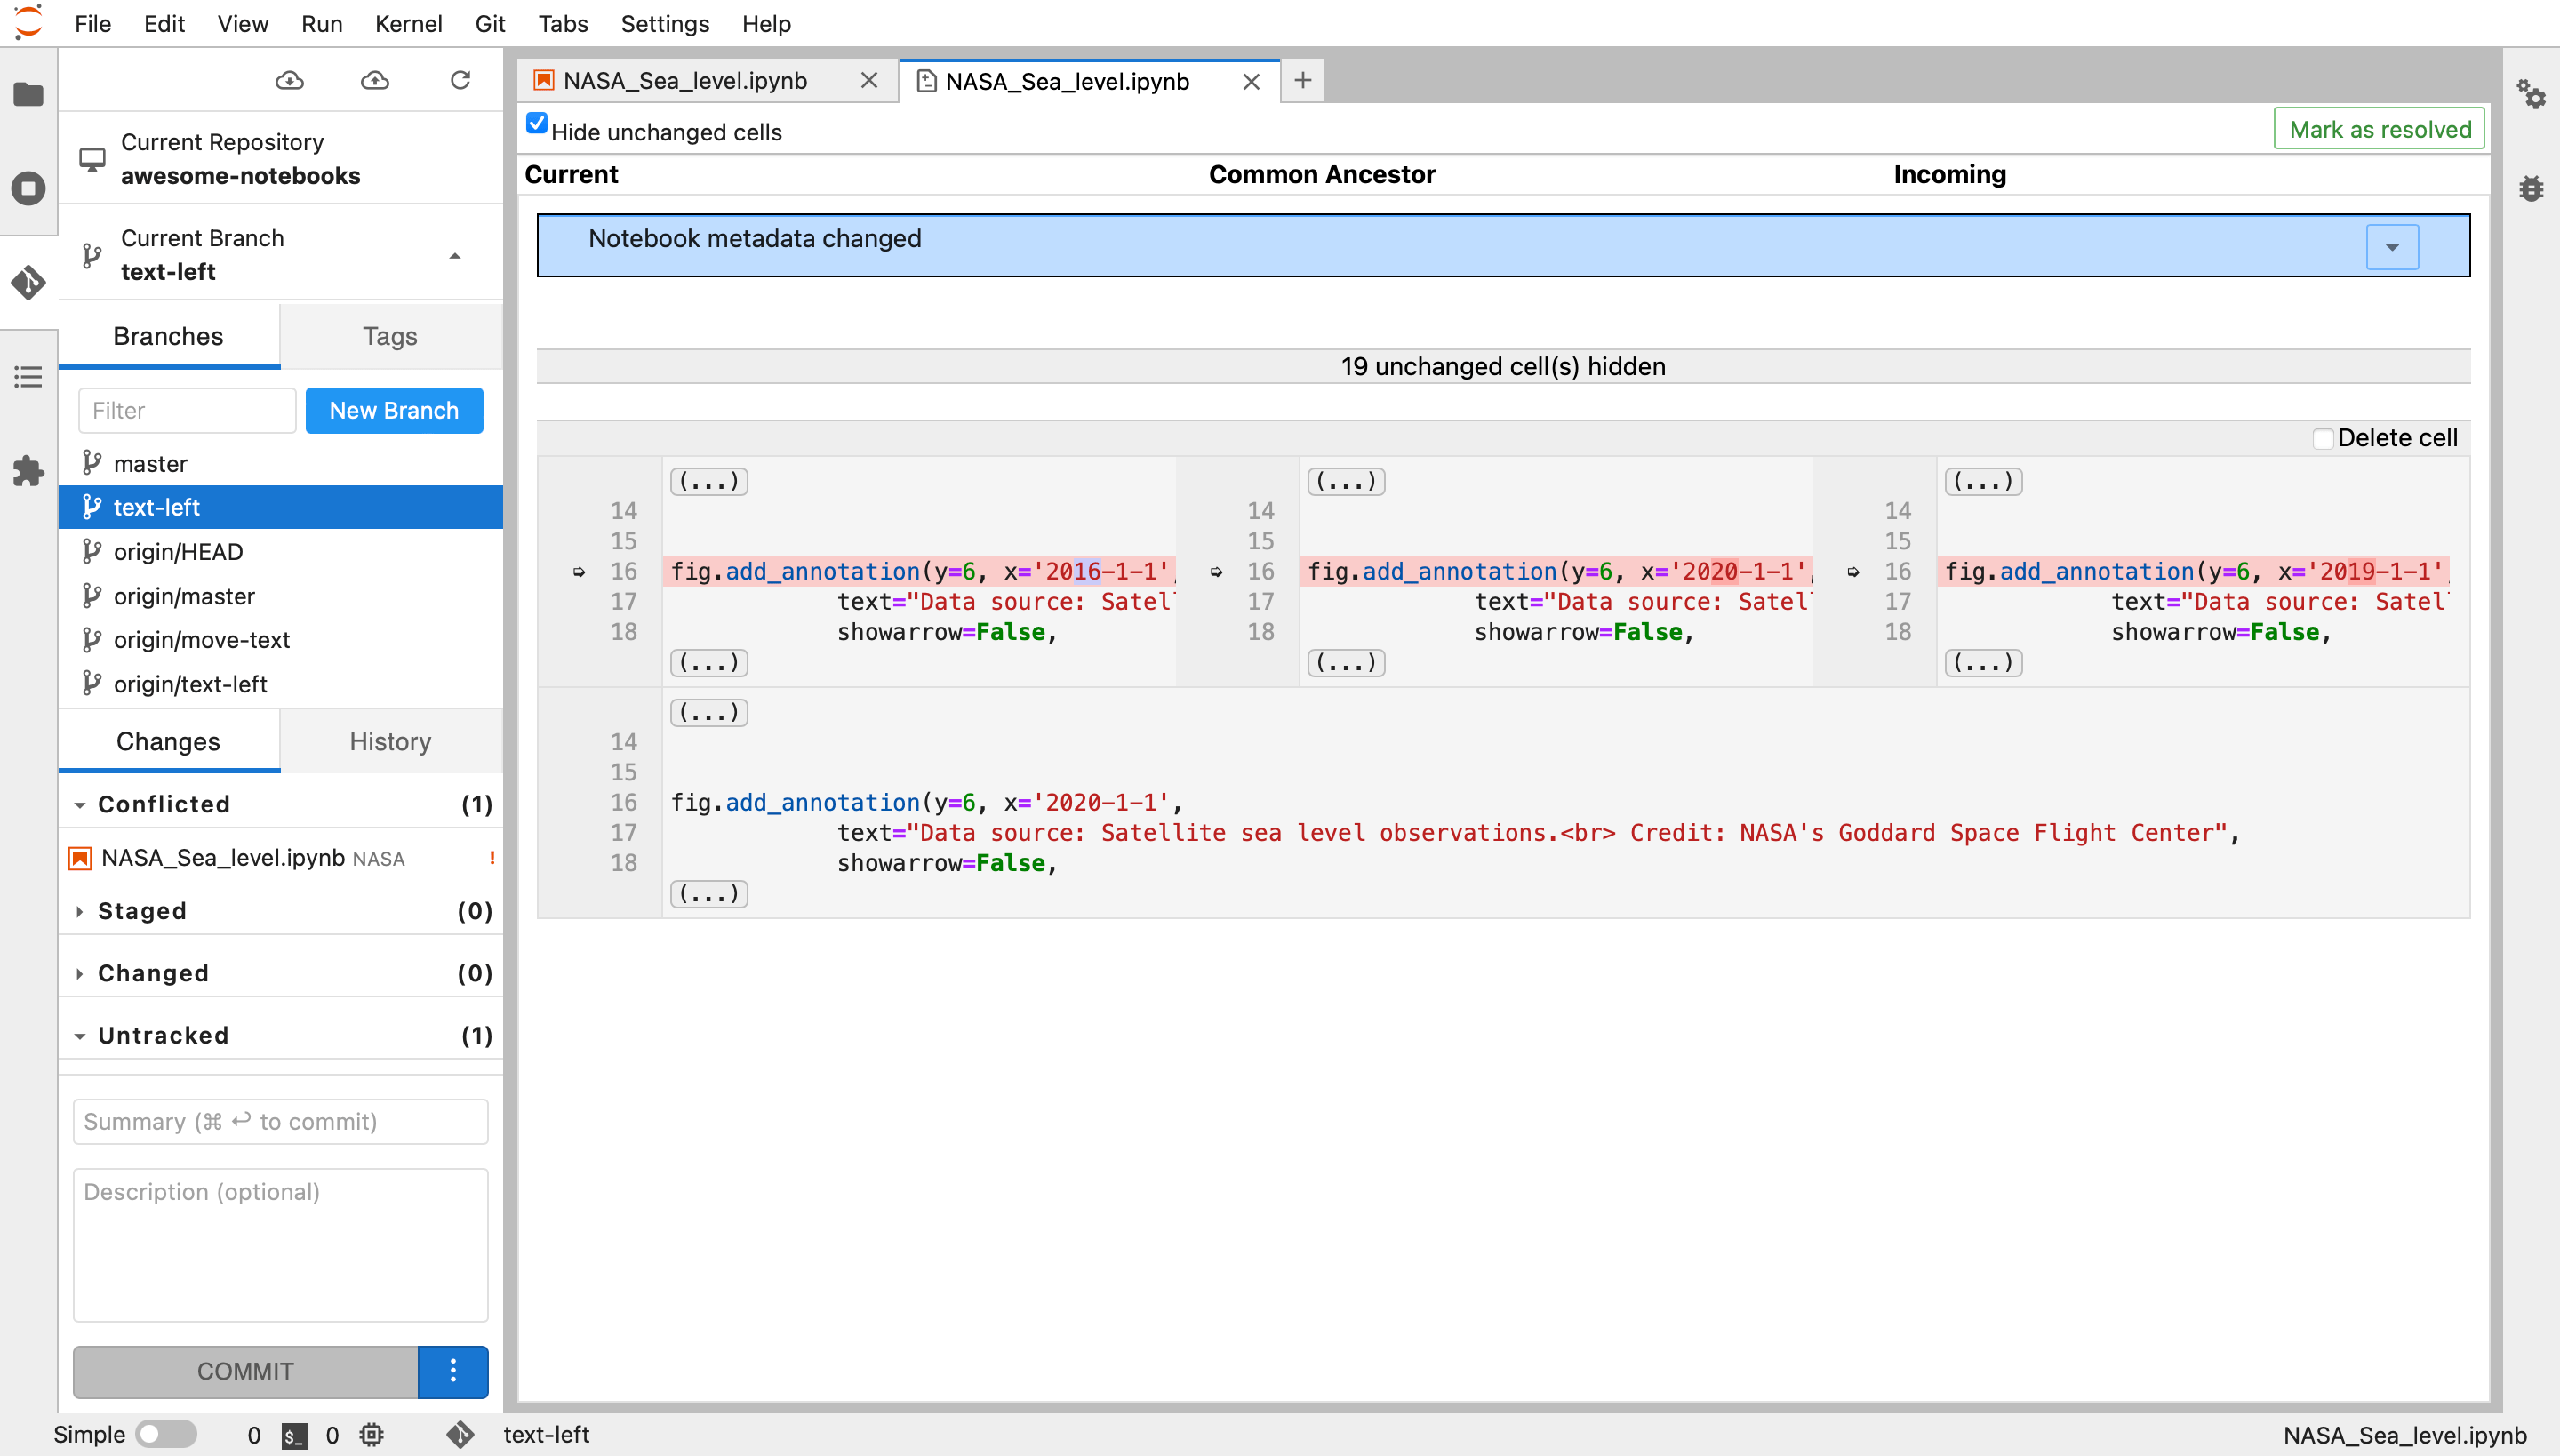
Change the bottom cell to the date you want - say 2016-01-01 - then click on “Mark as resolved”. You will see the notebook file move from the “Conflicted” section to the “Staged” section. It’s ready to commit. Use the bottom commit box to commit, push the commit, and you’re done!
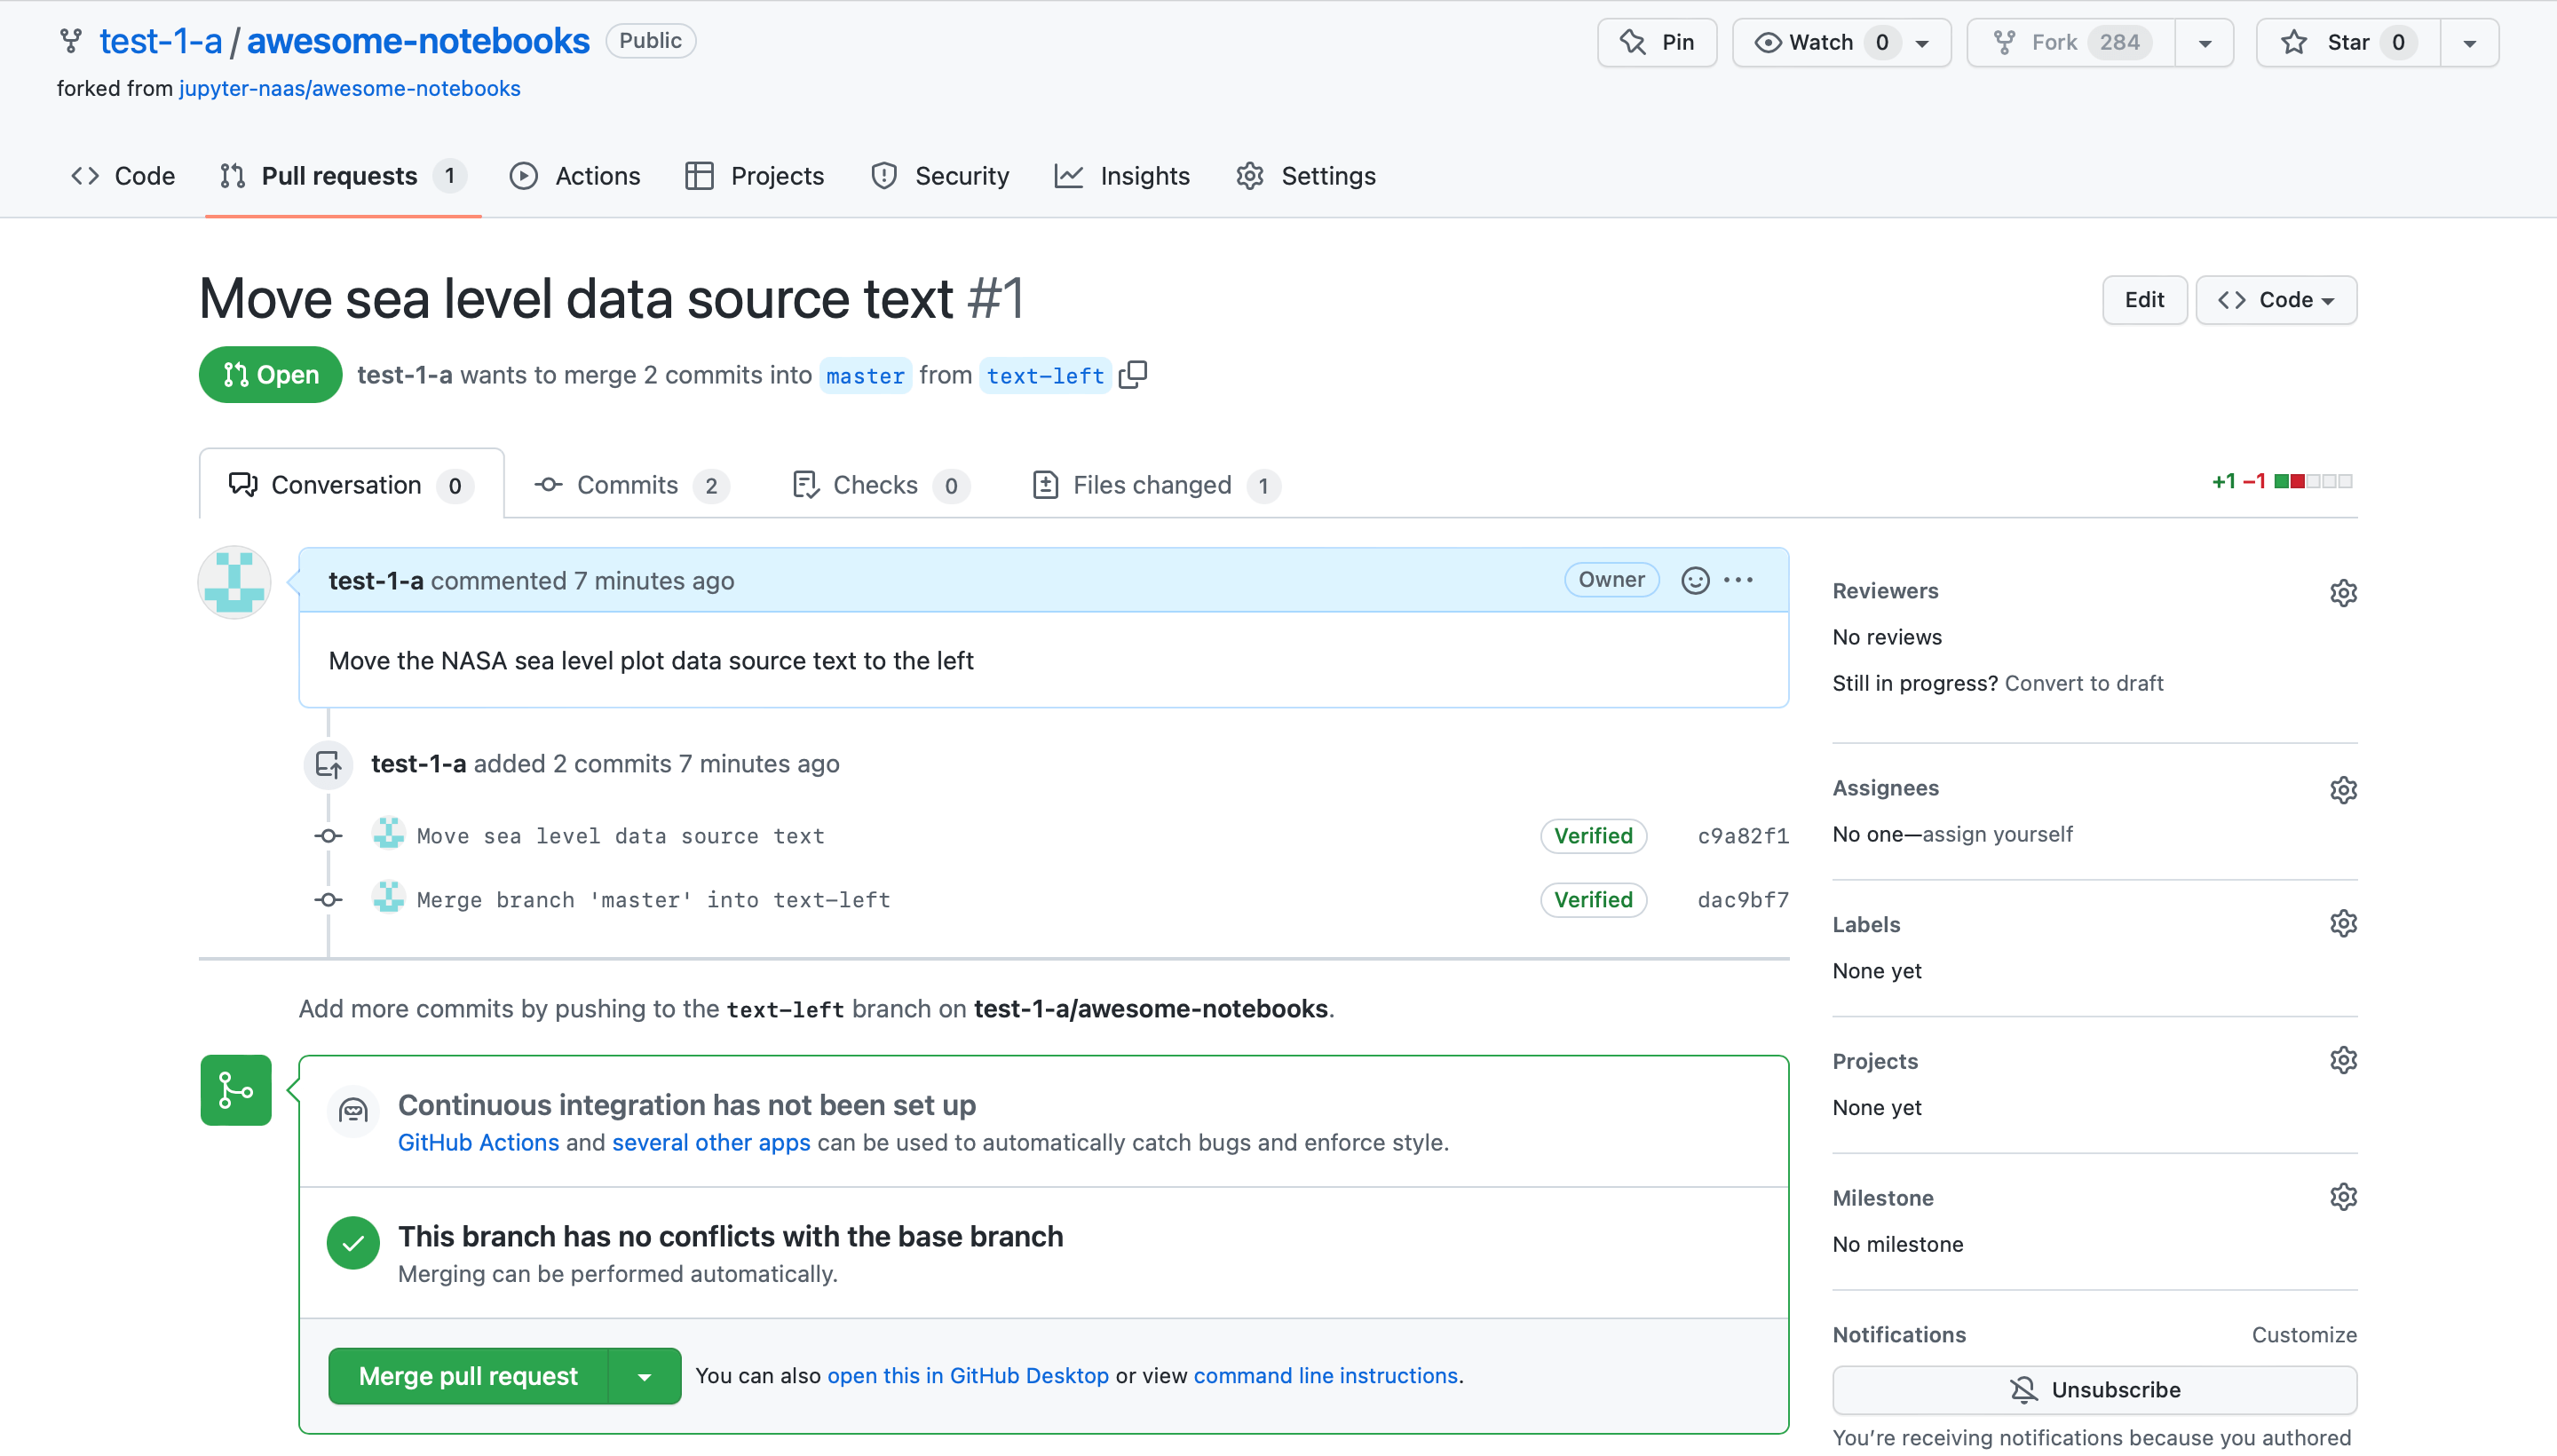
You’ve resolved the notebook merge conflict with the help of JupyterLab git extension. Now if you go back to GitHub, you’ll see the conflict is gone and our pull request is ready for review:
GitHub Code Review for Jupyter Notebooks
The JupyterLab Git extension covers the local side of the workflow — diffing and merging on your own machine. Code review happens later, on the pull request, and that’s a separate stage. If you open the “Files changed” tab of your notebook’s pull request on GitHub, you’ll see the diff in raw JSON format:
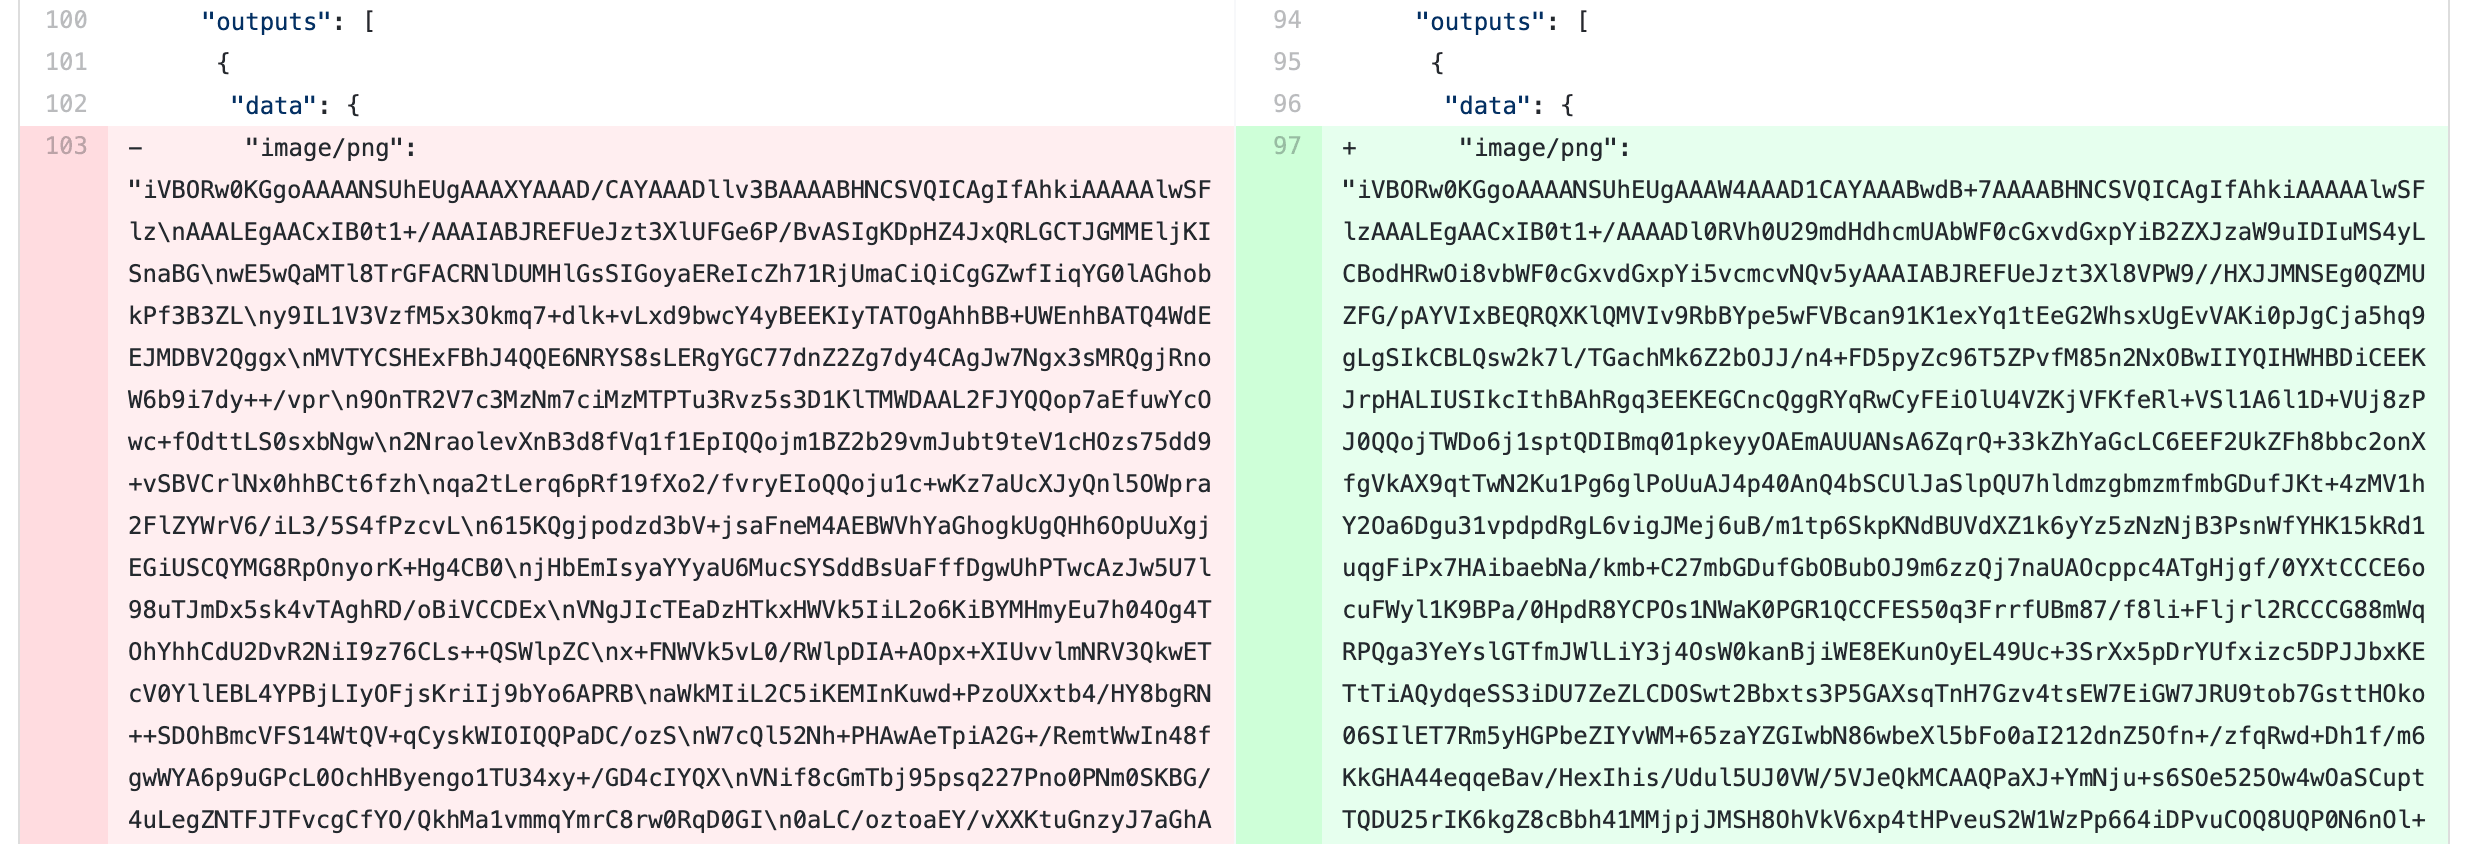
As you can imagine, a textual JSON diff (like above) makes notebooks hard to review on GitHub.
For the review stage, a notebook-aware tool like ReviewNB shows a rich diff on the pull request — you can see which cells changed and leave a comment on any cell. The two tools are complementary: the JupyterLab Git extension for local diff and merge, ReviewNB for review on github.com.
ReviewNB is a GitHub Marketplace app and works with GitHub and Bitbucket repositories.
FAQ
How do I install the JupyterLab Git extension?
On modern JupyterLab, run pip install --upgrade jupyterlab jupyterlab-git (or conda install -c conda-forge jupyterlab jupyterlab-git). Restart JupyterLab and a Git icon appears in the left sidebar.
Does the JupyterLab Git extension work with JupyterLab 4?
Yes. The current version targets JupyterLab 4, the current release line. Older maintenance branches support JupyterLab 2.x and 3.x — see the extension’s GitHub page for version-specific install notes.
Can I see notebook diffs in JupyterLab?
Yes. The extension shows a rich, cell-by-cell diff (powered by nbdime) so you compare rendered notebook cells instead of raw JSON. Hover over a changed file in the Git panel and click the diff icon.
How do I resolve a notebook merge conflict in JupyterLab?
When a merge conflict occurs, the notebook appears in the “Conflicted” section of the Git panel. Double-click it to open a three-way view — your branch, the original, and the incoming change — pick the cell content you want, then “Mark as resolved” and commit. This avoids hand-editing conflict markers inside the .ipynb JSON. For a step-by-step walkthrough, see the advanced Git ↔ Jupyter guide.
JupyterLab Git extension vs ReviewNB — which should I use?
They solve different stages and work well together. The JupyterLab Git extension handles local version control: clone, commit, diff, and merge on your machine. ReviewNB handles review on github.com, adding rich diffs and cell-level comments to pull requests. Use the extension while you work; use ReviewNB when your team reviews the pull request.
End note
The JupyterLab Git extension gives us a visual way to keep track of our branches and commits, all from inside the Jupyter UI — what a pleasure!
With built-in diffs and support for merge conflicts, this extension makes your day-to-day branching, committing, and pushing as simple as a few clicks. We all need a bit of a push to version control our notebooks more consistently - this could be the push your team needs!
To explore other JupyterLab Git extensions, you can check out the JupyterLab GitPlus extension by ReviewNB on GitHub, or read about it on our blog. It helps push commits and create pull requests from JupyterLab.
If you’re using AI assistants to write notebooks, see our guide on using Claude Code with Jupyter notebooks.